Summarize
- Autumn darkness requires extra lighting on the terrace for safety
- The NEON IP65 LED strip offers adjustable color temperature and high CRI
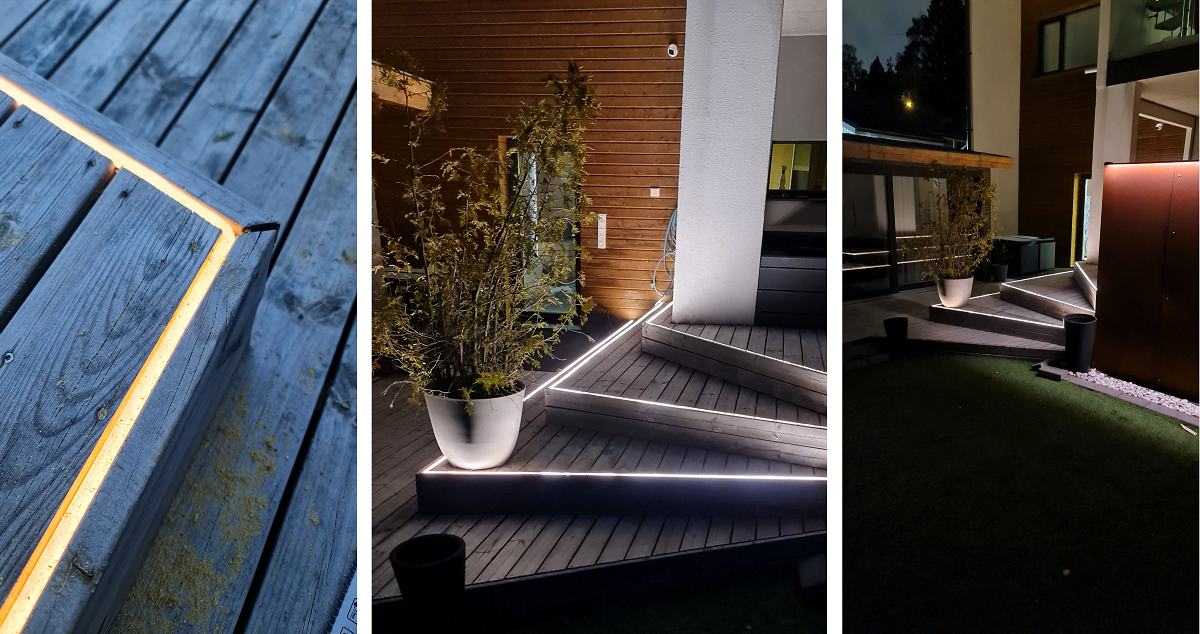
- Led strip was installed in terrace board gap, 11mm wide and 28mm deep
- Wireless Zigbee controller allows you to adjust the brightness and colour temperature of the light
- When dimmed, the LED strip consumes only about 30W of electricity.
Autumn is coming and the dark period is getting longer. The backyard would still be nice to have and you need some light to see the stairs without tripping. So let’s get to it and install the LED strip on the terrace! Read here how it was made.
Easy terrace lighting with NEON LED strip
The LED strip used was a color temperature adjustable high color rendering index (CRI) NEON IP65 LED strip. The advantage of a color temperature adjustable strip is that it allows you to achieve just the right tone, perfectly matching the surroundings. The tape was pressed into a groove just 11mm wide between the decking board and the end board.
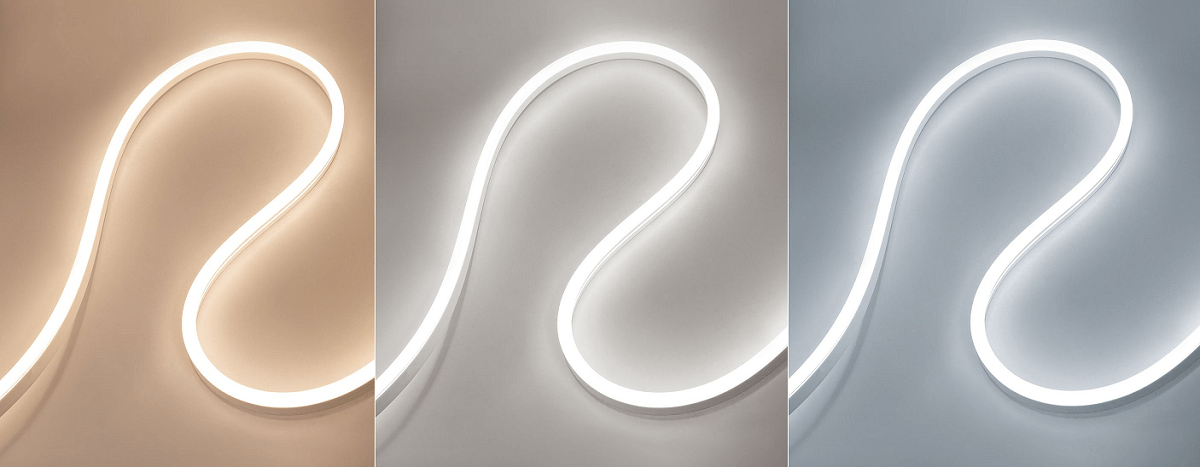
A meter of NEON IP65 CCT 14.4 W/m LED strip provides 1000 lumens, so overall it produces slightly too much light for outdoor use — but fortunately, it can also be dimmed. In practice, it is kept at 15-20% power all the time to avoid too harsh light on the eyes and to fit nicely into its surroundings. In terms of effective power, 7.2 W per meter would be enough for a project like this, but the NEON strip is only available in the 14.4 W/m version.
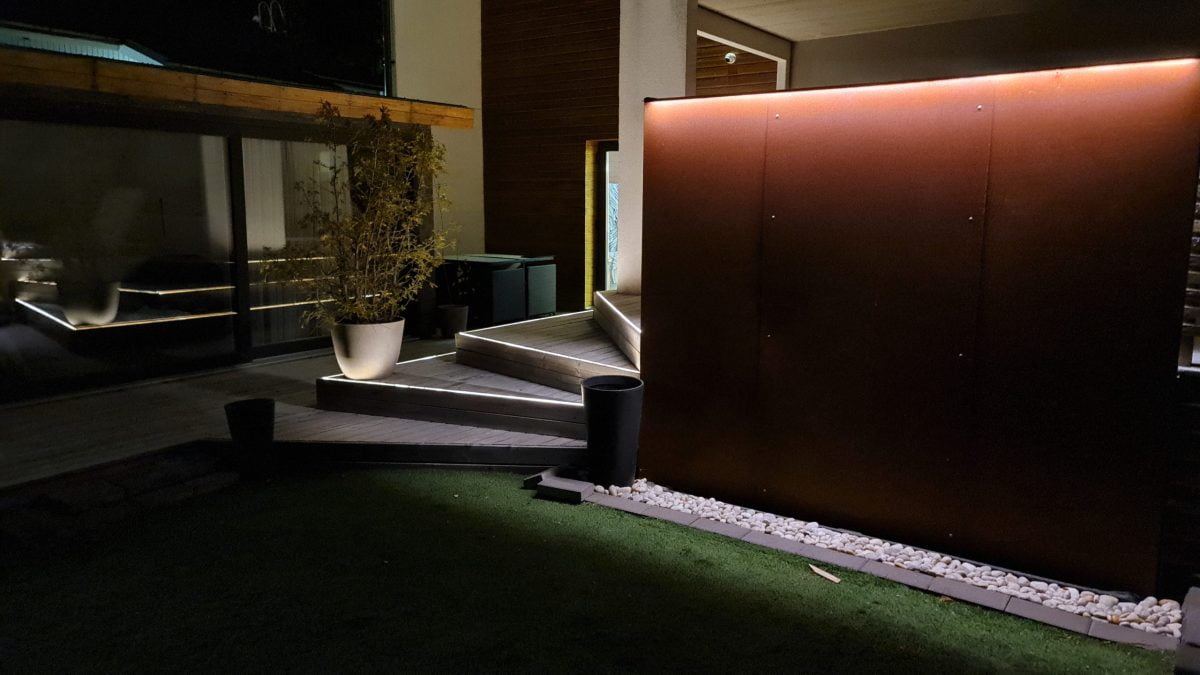
LED strip for terrace, made at LedPaja or at home.
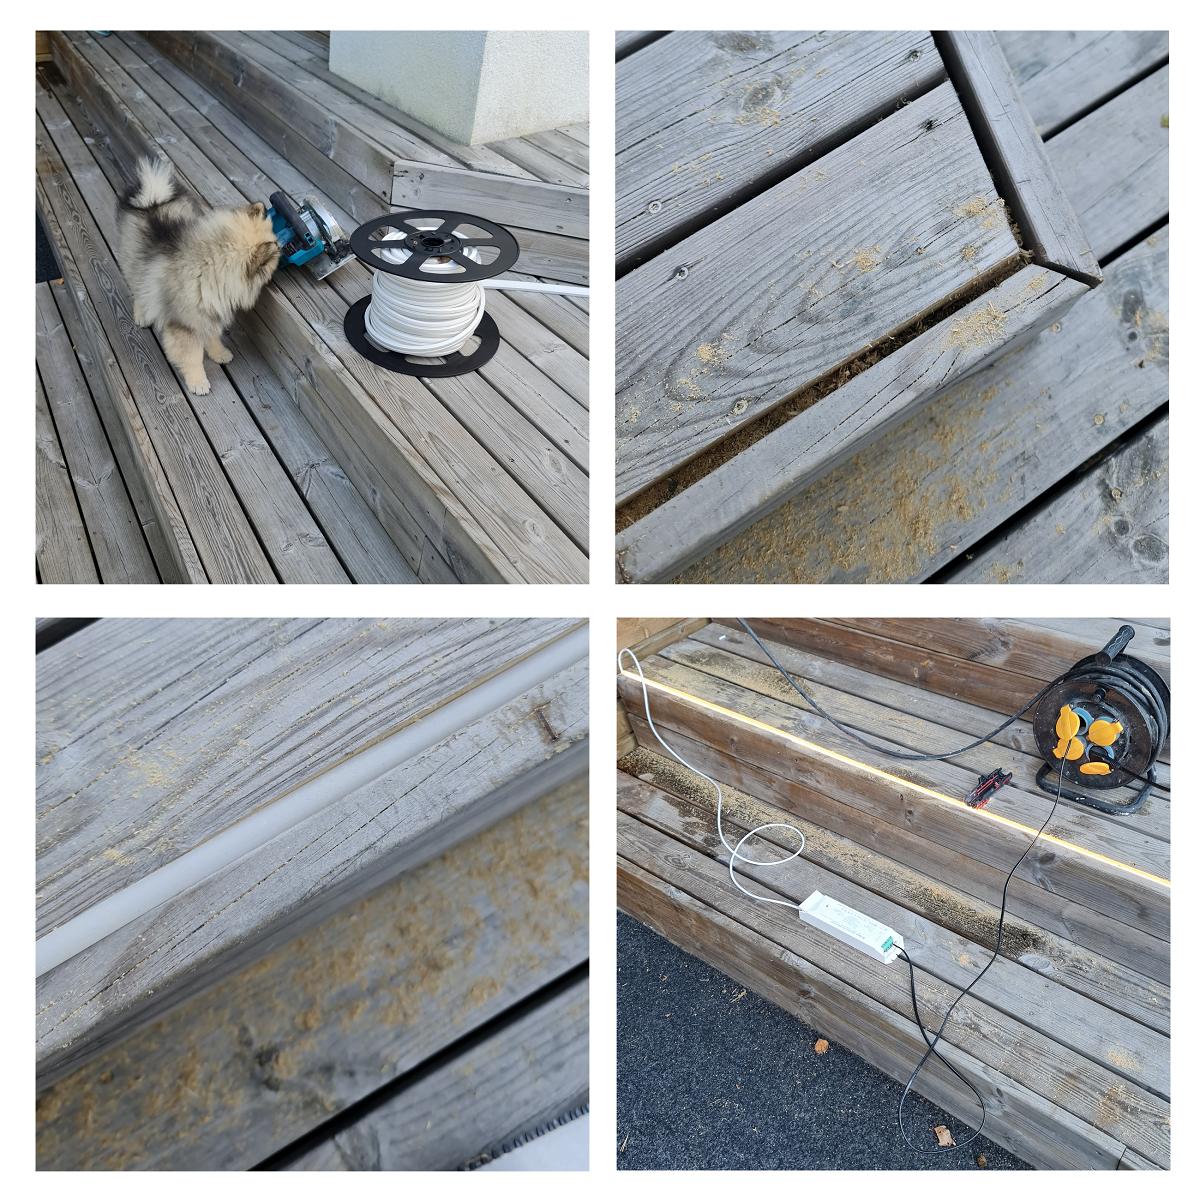
The idea for stair lighting was born, and the implementation steps were as follows:
- Choosing the LED strip.
- The inspector checks the equipment…
- Driving a gap with a circular saw.
- Cutting the LED strip to desired length.
- Measuring the connection wire to the transformer and soldering it to the LED strip.
- Pushing the led stip to the gap.
- Connecting the wires to the driver.
- Pairing the wireless control (Zigbee) between the controller and the driver.
The first option was to use an IP65 aluminum profile with a 7.2W CCT LED strip installed in it. This is the most common and best way to ensure the durability of the abrasion and to keep the stripin place. However, at the installation site it was found that the terrace decking was built without a 2 cm overhang/lip on the step, so it wasn’t possible to attach a traditional led profile to the underside of the step. I had to think of something else.
The old terrace had some drying and shifting over time, which had already created small gaps between the fascia board and the deck boards. An idea was born — simply make the gap larger. The easiest way to do this is with a hand-held chisel and a clipper. I drove the slot in place, but lengthwise the board could also have been detached and run loose to make it narrower. So, easily an LED strip for the terrace!
The LED NEON strip is 11 mm wide, 22 mm high, and flexibly rubber-like, so a 10–11 mm groove would provide a snug fit. The decking board is typically 28mm thick, so driving the board completely through and installing led stripagainst the deck to a depth of 28mm at the bottom proved to be the best solution. The NEON LED strip is then fully protected from snow shoveling and footsteps, as well as free from side glare. Before I took the wires under the terrace for good, I tested the functionality of each led strip with a driver. As I pressed the NEON strip into the groove, it was very tight in some spots, so I used a wooden stick as a tool to ensure the strip wouldn’t get damaged.
An alternative way to install the strip would have been mounting it on the step’s front edge, between two boards, to provide forward-facing illumination.
Versatility with easy adjustment of colour temperature
The colour temperature of the light can be easily adjusted to the desired Kelvin level with a wireless controller. For example, a warm dimmed light just to set the mood, or a slightly more neutral and brighter light when playing in the backyard with the dog or children. The controller is a Zigbee controller, which was paired with a Zigbee receiver 24V. The receiver was mounted on the rear of the 240W 24V IP 65 driver before the led strips, inside the protective box The driver was screwed to the frame under the terrace. 230V driver-> receiver -> led strips.
If you want to time and program the light, you also need a Zigbee bridge or hub, such as Philips Hue or Samsung Smart Things. This site has Home assistant and Conbee2 turning on the lights at dusk automatically.
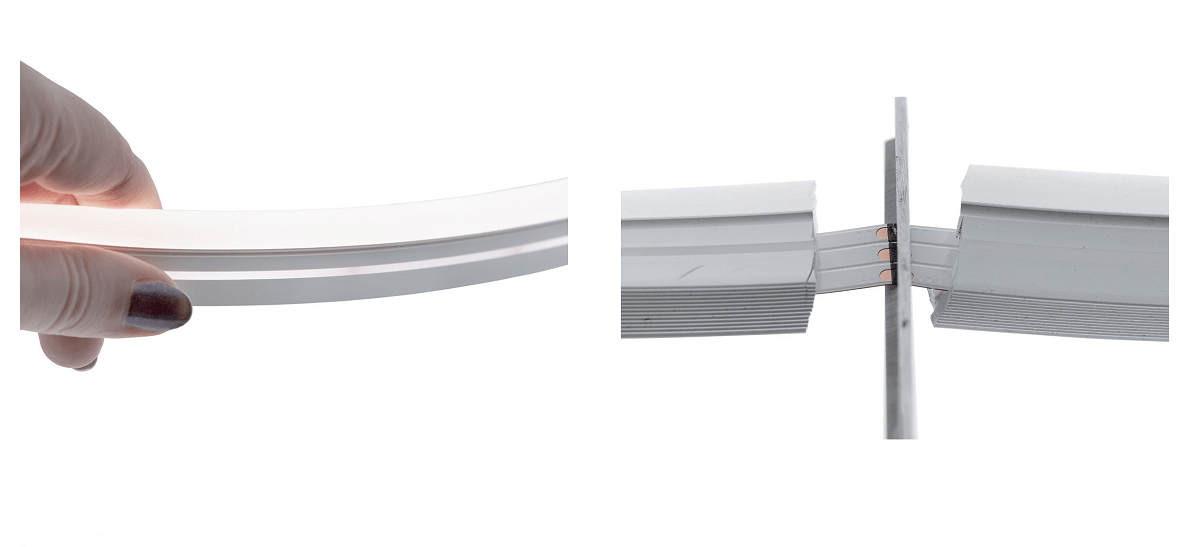
LED NEON CCT strip is easy to cut every 5 cm. So after initially cutting a piece with an extra 10 cm just to be safe, I placed it into the groove and only then cut it to its final length. This is important because the NEON strip is flexible and stretchable, and it’s easy to accidentally measure it while stretched — only to find it too short once installed. Both ends of the strip come with end caps, and for a secure seal, it’s a good idea to add silicone or another type of sealant to the inside of the cap.
Amount of light on the terrace
The human eye can detect the flame of a candle outside. So a very small amount of light is enough to guide the passage. There was indeed too much light when it was at 100% power and in practice it is kept at 15% power. This also means electricity savings, as the led strip for the stairs was 15 metres in total and at full power it consumes approx. 200W, but dimmed only approx. 30W! Still, the amount of light is sufficient to walk up and down the stairs and create the right atmosphere. And of course there is plenty of room for manoeuvre.
I could say that lighting is used for decorating anywhere, and the terrace is no exception. We’ve used LED NEON strip before to create a “work of art.”
Read more about how we messed up and cluttered up the office, but it’s a great idea! In this NEON Ceiling article: curved shapes with led light on the ceiling.
Read more about our LedPaja service if you are interested in custom-made LED striplighting!


