Summarize
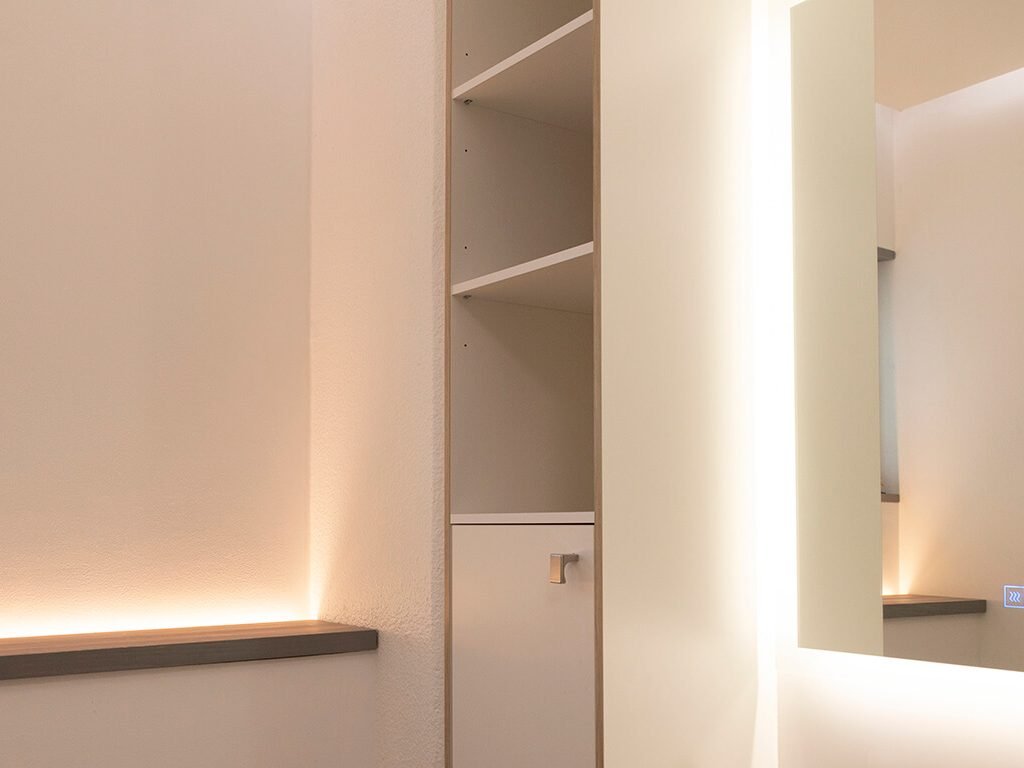
- The starting point for the renovation was to improve the lighting in the toilet and create a better atmosphere.
- Lighting was implemented with indirect CCT LED lighting and a light mirror
- Lowering the ceiling hid the LED strip, creating indirect lighting
- Wireless control for easy and flexible lighting adjustment
- The total cost of the renovation was 2 577 euros, including labour costs
Softer lighting for the WC space during the renovation
The starting point for the renovation was the lighting of a 1.5 square meter WC. The lighting had previously been implemented with a single ceiling light. As the renovation became timely, the goal was to bring more versatility and ambiance to the lighting of the small space. The WC has one window, but for most of the year, it does not provide sufficient natural light.
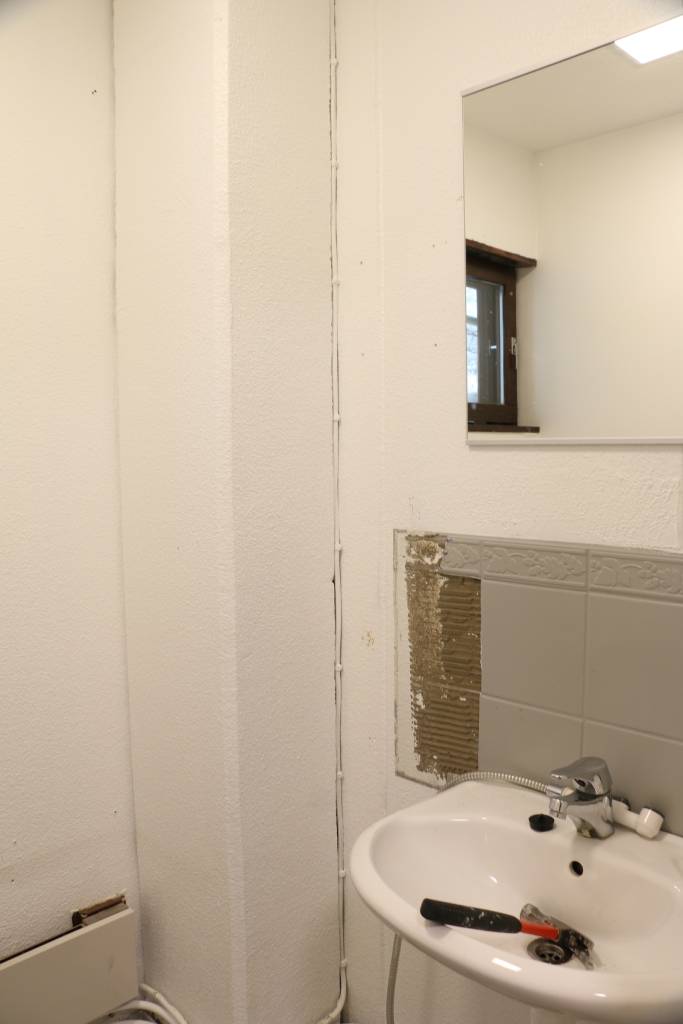
It was decided to implement the lighting with an indirect LED profile and a lighted mirror
The goal was to invest in the lighting of the small WC to create a more atmospheric space. While there was enough light, the single on/off ceiling light was replaced with more adaptable lighting. To achieve a spacious and calm appearance, white and grey were chosen as the colors for the walls, floor, and fixtures.
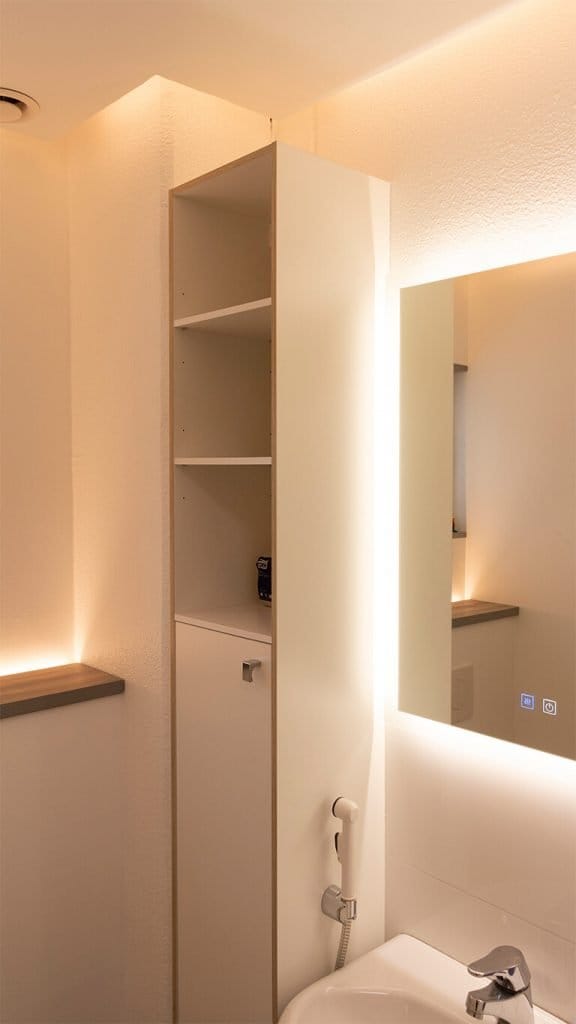
Lighting was chosen to serve as a decorative element, so a dimmable and color temperature adjustable 14.4 W/m LED strip was installed in the ceiling. An additional LED strip was also installed behind the new wall-mounted WC unit, with a power rating of 7.2 W/m and a warm white light color. Additionally, a HALO600 light mirror was selected above the washbasin. This created a versatile and adjustable lighting setup.
The ceiling drop allowed the LED strip to be beautifully concealed, creating indirect lighting. The drop ceiling was built across the entire ceiling area, and the LED strip running along the walls is controlled wirelessly. The LED strip behind the WC wall element is operated with a motion sensor, while the mirror light is controlled using the switch on the mirror itself.
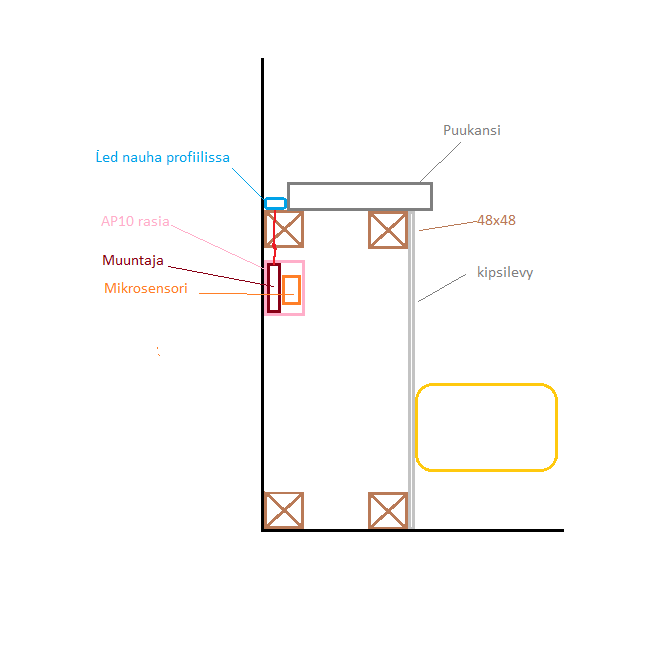
The indirect LED strip behind the wall-mounted WC element is installed in a 3 cm deep groove with a low 8×17 mm aluminum profile. The cover of the WC wall element also functions as a service hatch, making it easy to remove.
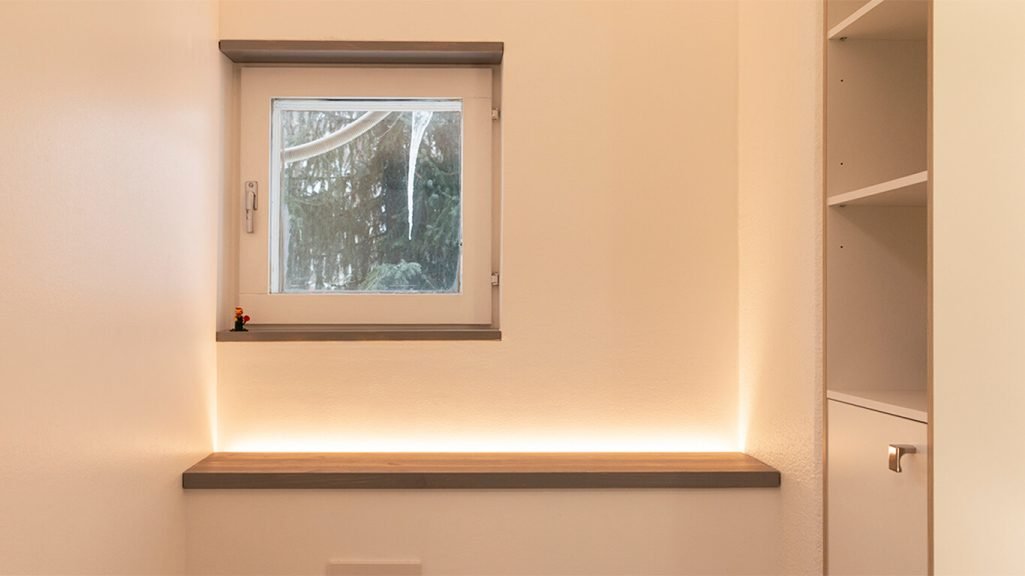
Creating decorative lighting
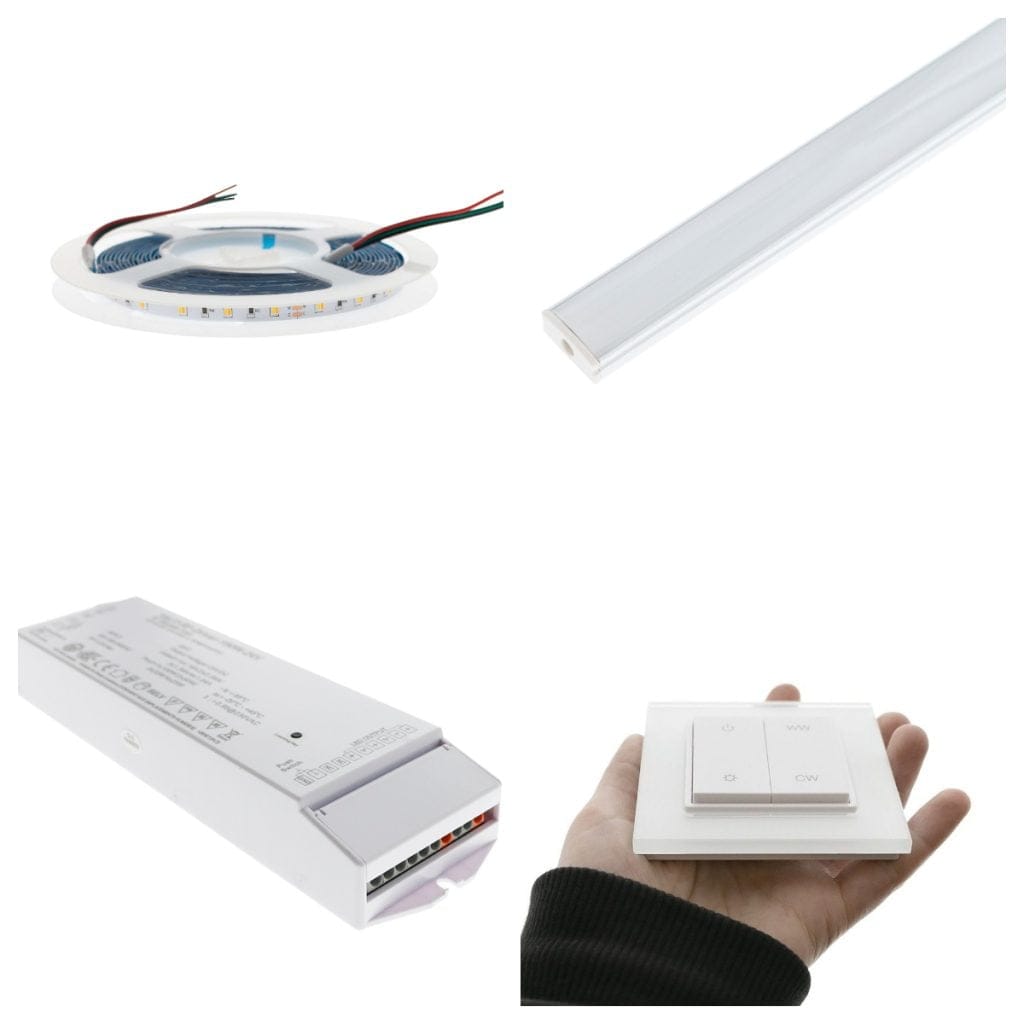
For the ceiling-mounted LED strip lighting, a color temperature adjustable (CCT) LED strip 14.4 W/m was selected. It provides approximately 500 lumens per meter in direct lighting. As indirect lighting, the luminous output is estimated at around 250 lumens per meter, as the light reflects off white-painted ceiling surfaces. The LED strip was installed along every edge, totaling 3.2 meters, ensuring even illumination throughout the room. The center of the room reaches a comfortable lighting level of about 200 lux when only the ceiling light is on.
The luminous output of indirect lighting depends greatly on the color and material of the reflective surface, as well as the reflection angle and the distance from the light source. A low, upward-facing aluminum profile with a plastic cover was chosen for the LED strip. This choice ensured an evenly distributed lighting result. As an alternative to the upward-facing profile, a 45-degree angled profile can also be used, which reflects more light toward the wall but creates a slightly sharper transition between light and shadow.
The LED strip’s 100W power supply, an RF transformer enabling wireless control, fit between the dropped ceiling and the original ceiling. A wireless dimmer designed for color temperature adjustable LED lighting was installed in place of the previous light switch.
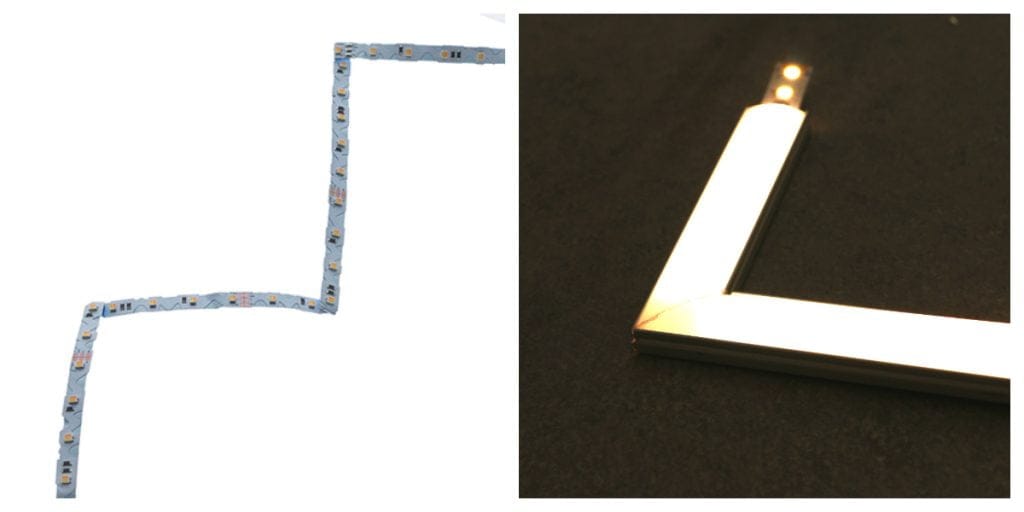
An installation with multiple angles can be done by soldering short, approximately 5 cm long jumper wires between the LED strip segments, as the chosen LED strip and profile cannot be bent sideways. The soldering and attaching of the LED strip to the profile can be done either by yourself or preassembled at LedStore’s LedPaja workshop, ready for installation.
Another option is to use CCT LED strip that can be bent sideways, in which case the profiles are cut to length and the strip is bent into corners easily and securely. No punching is required, but there must be enough installation space to allow the LED strip to be seen when installed.
Wireless control of indirect ceiling lighting
With a wireless control solution, the switch does not require separate wiring, as the connection between the LED strip’s transformer and the switch is established via a radio frequency (RF) signal. The right-side WW and CW buttons allow seamless adjustment of the light’s color temperature between warm white and cool white. On the left side, the upper button turns the lights on and off, while a long press on the lower button smoothly dims or brightens the lights.
The wireless control button can be freely positioned wherever you want. Infinitely variable color temperature adjustment WW provides warmer light, and CW provides cooler light.
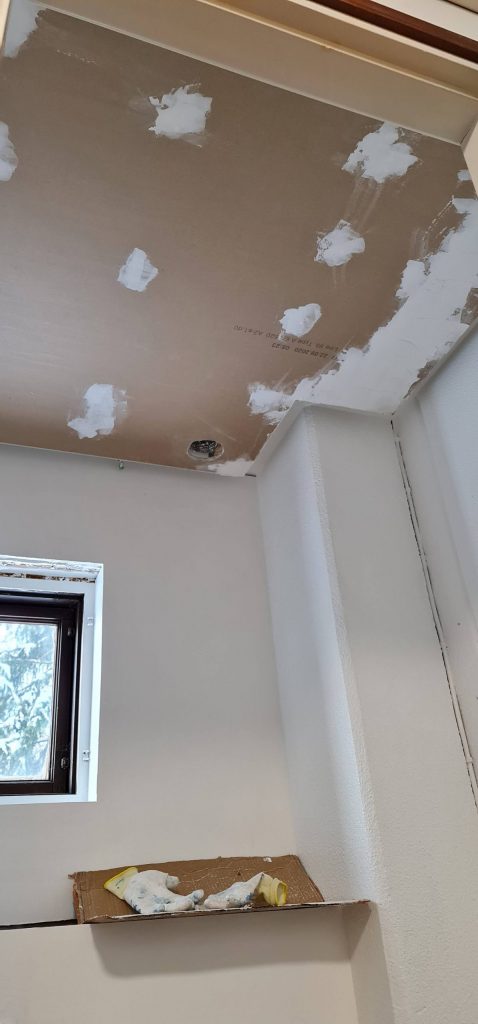
The renovation begins – wall framing and roof lowering
A casing was built for the wall-mounted WC, and at the same time, the entire WC was repainted and the wooden surfaces were treated. On top of the casing, a cover made from a 3 cm high board was installed, 2 cm shorter in depth than the casing itself. This created a suitable groove along the wall for the LED strip, which provides indirect upward lighting. A motion sensor was connected to the LED strip, so the light turns on automatically whenever movement is detected. The LED strip’s transformer and motion sensor fit well inside the WC casing, where a power outlet was also installed for the electrical supply.
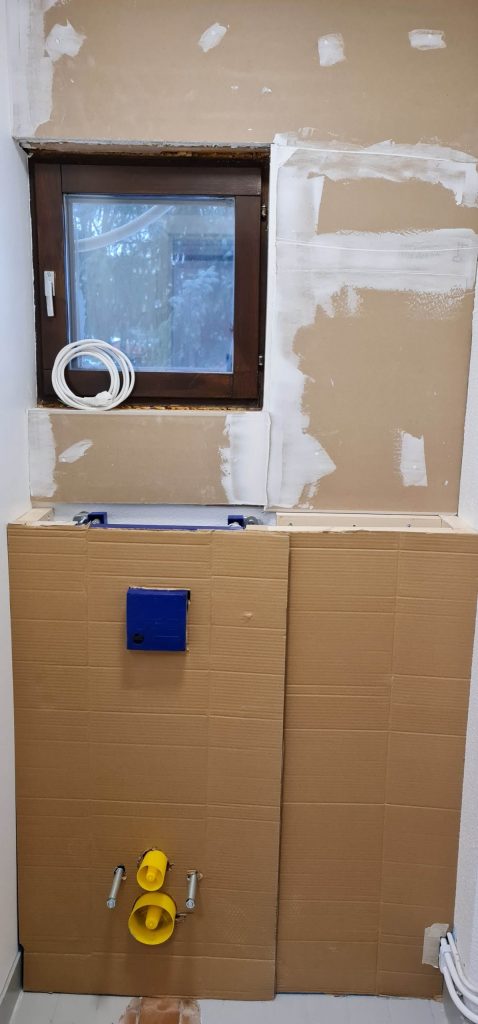
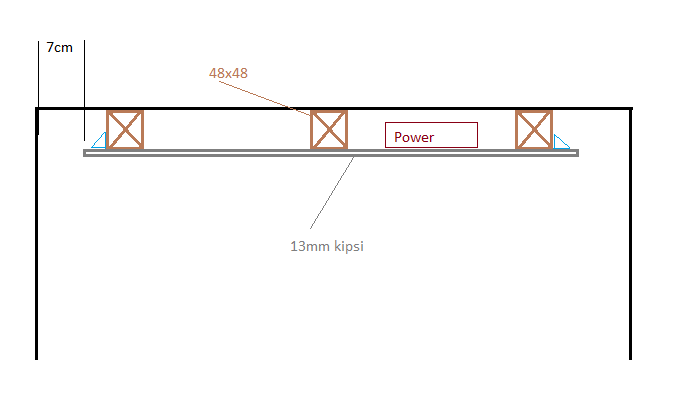
After the wall casing was completed, the ceiling drop was constructed. 48×48 mm framing timber was attached to the ceiling, and the screw holes were filled, sanded, and painted with two coats. An opening was cut into the drop ceiling for the ventilation vent. The drop ceiling was made 7 cm shorter than the full ceiling dimensions on all sides to allow light to spread into the room.
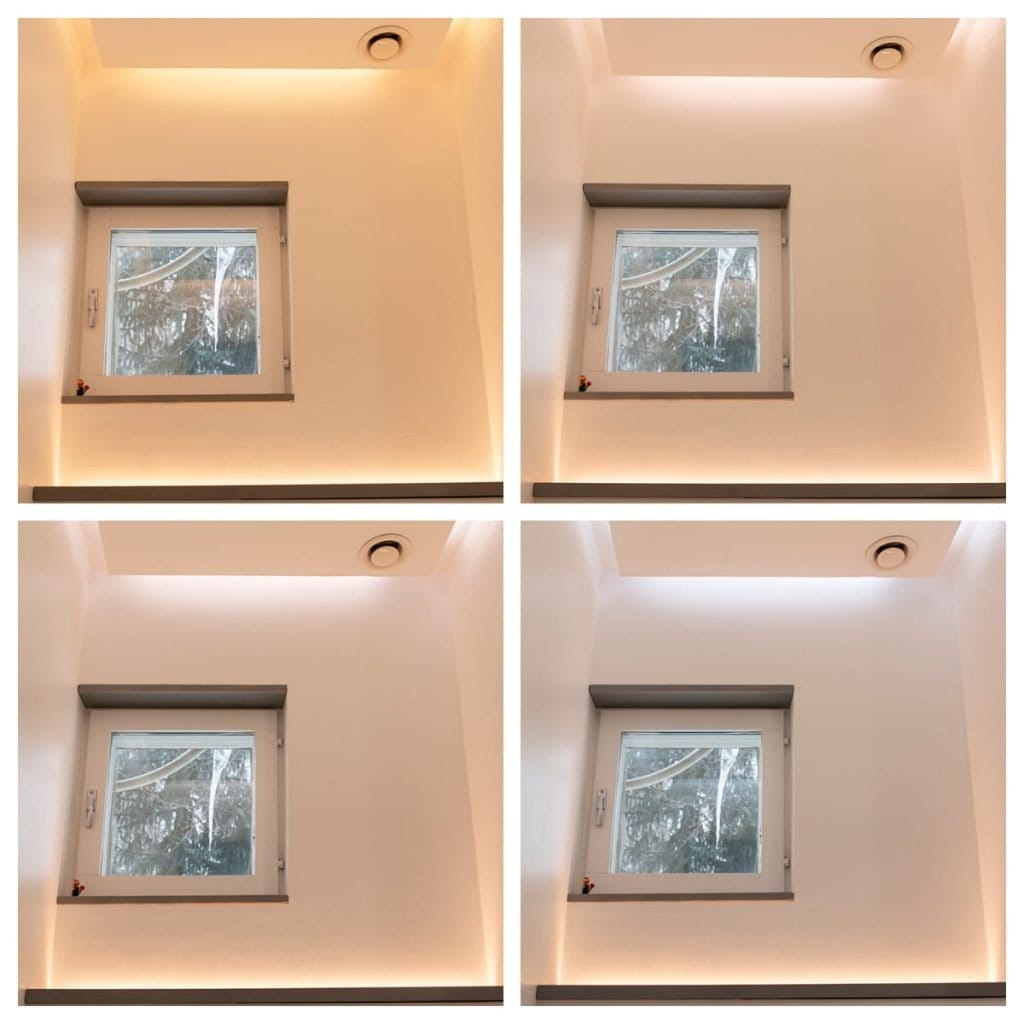
The renovation is progressing – CCT lighting creates many different atmospheres
Once the indirect lighting around the ceiling and the LED strip behind the wall element were in place, it was possible to see how much the adjustment of the colour temperature of the light in the ceiling LED strip affected the atmosphere in the room. The variations in colour temperature range from around 2800 Kelvin to around 5500 Kelvin in the following series of pictures.
The HALO 600 is surrounded by an LED strip with a 4000K neutral light hue. The neutral shade is fresh and ideal for decoration, for example. With a total of 2.5 metres of LED strip, the LED spotlight provides plenty of light for a small toilet space. The light is emitted both through the frosted glass edge of the mirror and indirectly through the walls. When the mirror light is on, the light output of the 1.5 square metre space is doubled.
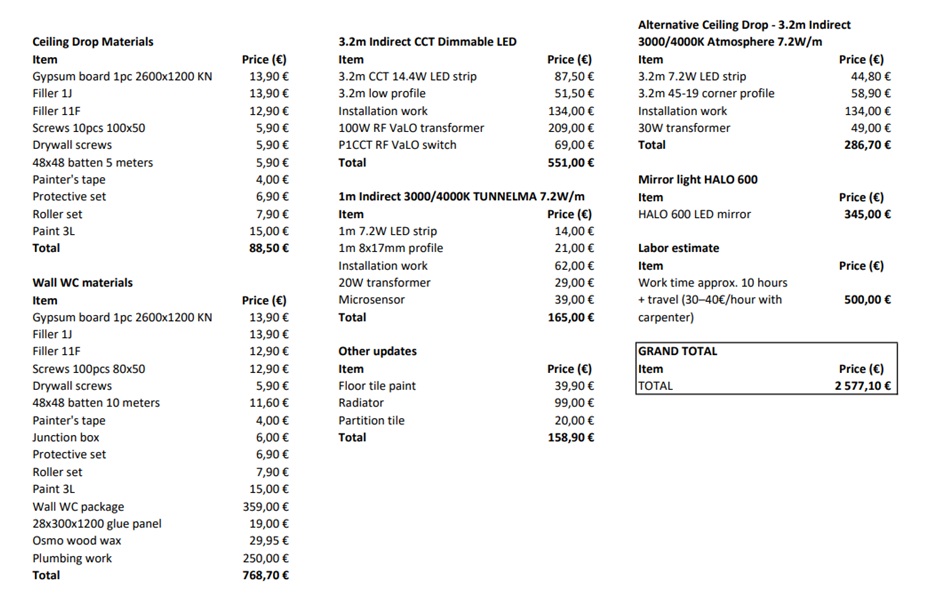
Total cost of the renovation 2 500 EUR
Almost everything in the WC was renewed, except for the washbasin and faucet. The total cost of the renovation, including labor, was €2,577. When calculating the prices of the lighting solutions separately, the cost of the indirect ceiling lighting came to €550. The implementation cost of the LED strip behind the wall element was €165. The LED lighted mirror cost €345, with the LED strip pre-installed in the mirror.
This three-level lighting setup provides adaptable and varied illumination for the space, controlled easily with user-friendly switches. The lighting serves beautifully as a decorative element, adding a touch of luxury to the room. The ceiling lighting is the largest individual lighting expense. However, it can also be implemented with a 7.2 W/m LED strip, in which case a 45-degree corner profile is recommended for directing the light. This option brings the cost down to €287, but the color temperature adjustment feature is not included.
Further information
At Lamppukauppa Led Store, we assist with lighting renovation planning and can recommend a suitable electrician and carpenter. Through our lighting design service, we design complete lighting solutions daily—for example, for detached homes. In our LedPaja workshop, we also prepare custom-fit LED strip profiles ready for installation.
Welcome to visit our store or online shop!

