Summarize
- Kitchen lighting upgraded with modern LED strip lighting
- Led strip offers dimmability and colour temperature control options
- The lighting solution cost €454 ready for installation
- The Led rail is easy to install and protects the LED strip
- Wireless RF lighting control
- or with Zigbee controllers
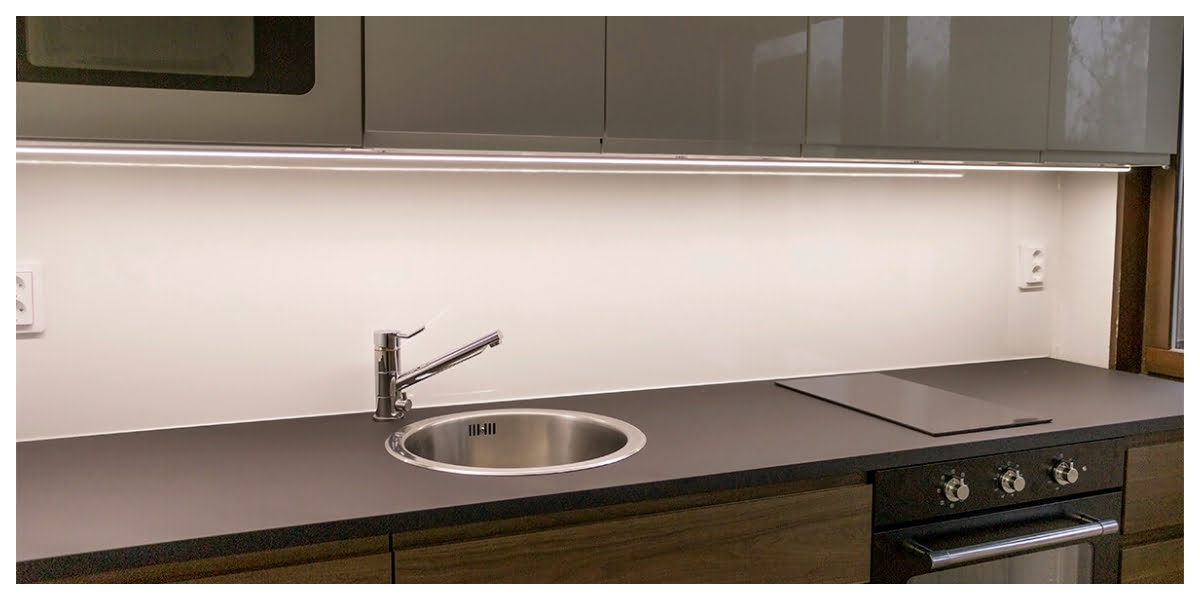
In connection with the kitchen renovation, the lighting in the kitchen area needed to be improved. The choice of cabinets and worktops was made with a view to creating modern and calm surfaces. The cabinets did not come with lighting, and the backsplash in the crawl space was to be kept as intact as possible. However, they wanted light on the level, so they opted for simple LED strip lighting. This solution provided a fair amount of even working light over the whole level, as well as dimmability and the possibility to change the atmosphere by means of a colour temperature control. Adequate and high quality lighting of the work surfaces is important for usability. For cooking, in particular, the colour rendering index is essential. The colour rendering index indicates how well and naturally a LED reproduces the colours of its surroundings. A sufficient amount of light makes work easier, especially in precision work.
Lighting in the kitchen – parts and prices
The kitchen renovation involved replacing the cabinets, countertops and appliances in the small kitchen. The lighting in the kitchen area was previously LED strip, so no changes were needed to the electrical installation. As the worktop was a poorly reflective matt black surface, the most efficient CCT strip in the LedStore range, with a high colour rendering power of 22 W/m, was chosen as the LED strip. The ribbon has dimming and colour temperature control, so that the same ribbon can be used to continuously select the shade of white light from warm orange to bluish daylight. The strip has very good thermal management, so the LED profile chosen was a low profile 7x18x2500 surface-mounted profile painted white. The power supply was a 24V, 100W RF transformer for wireless control , and the button was an easily retrofittable wireless colour temperature and dimming button. The lighting was prefabricated without installation by LedStore’s bespoke service LedPaja. The cost of the lighting for the renovated kitchen, ready to install at LedPaja, was €454. The money provided approximately 50 watts of LED strip power, providing 3,800 lumens of light over the distance of the worktop. The cost of the other parts of the renovation, including machines, faucets, cabinets and countertops, came to €3 000.
LedStore offers a wide range of options for implementation
Changing the operating switch function to a swing dimmer with colour temperature control would reduce the price by €80, as the transformer is also cheaper when ready to install with LedPaja. The lighting of the kitchen area can be made cheaper by using a 14.4 W/m non colour temperature adjustable LED strip with a slightly lower power output, but still providing good light on the worktop, and a one-piece dimmer switch from the VaLO series. This brings the price down by €130. If you opt for a contact dimmer that can be pushed into the LED strip, you don’t need as many features from the transformer, so the savings come from the transformer. Also, a contact dimmer is cheaper than a wireless wall controller. When ordered ready to install, the kitchen lighting is then €180 cheaper than the implemented solution. You can also buy the components separately from the LedStore online shop and do the joints, knocks and other work yourself. The consumer can also work with the Led strip himself. Only the installation of the mains power supply requires a professional electrician, unless there is a ready-made plug-in cable at the rear of the transformer. Check out our ready-made five-metre kitchen LED strip packages.
Kitchen worktop dimensions and choice of LED strip installation location
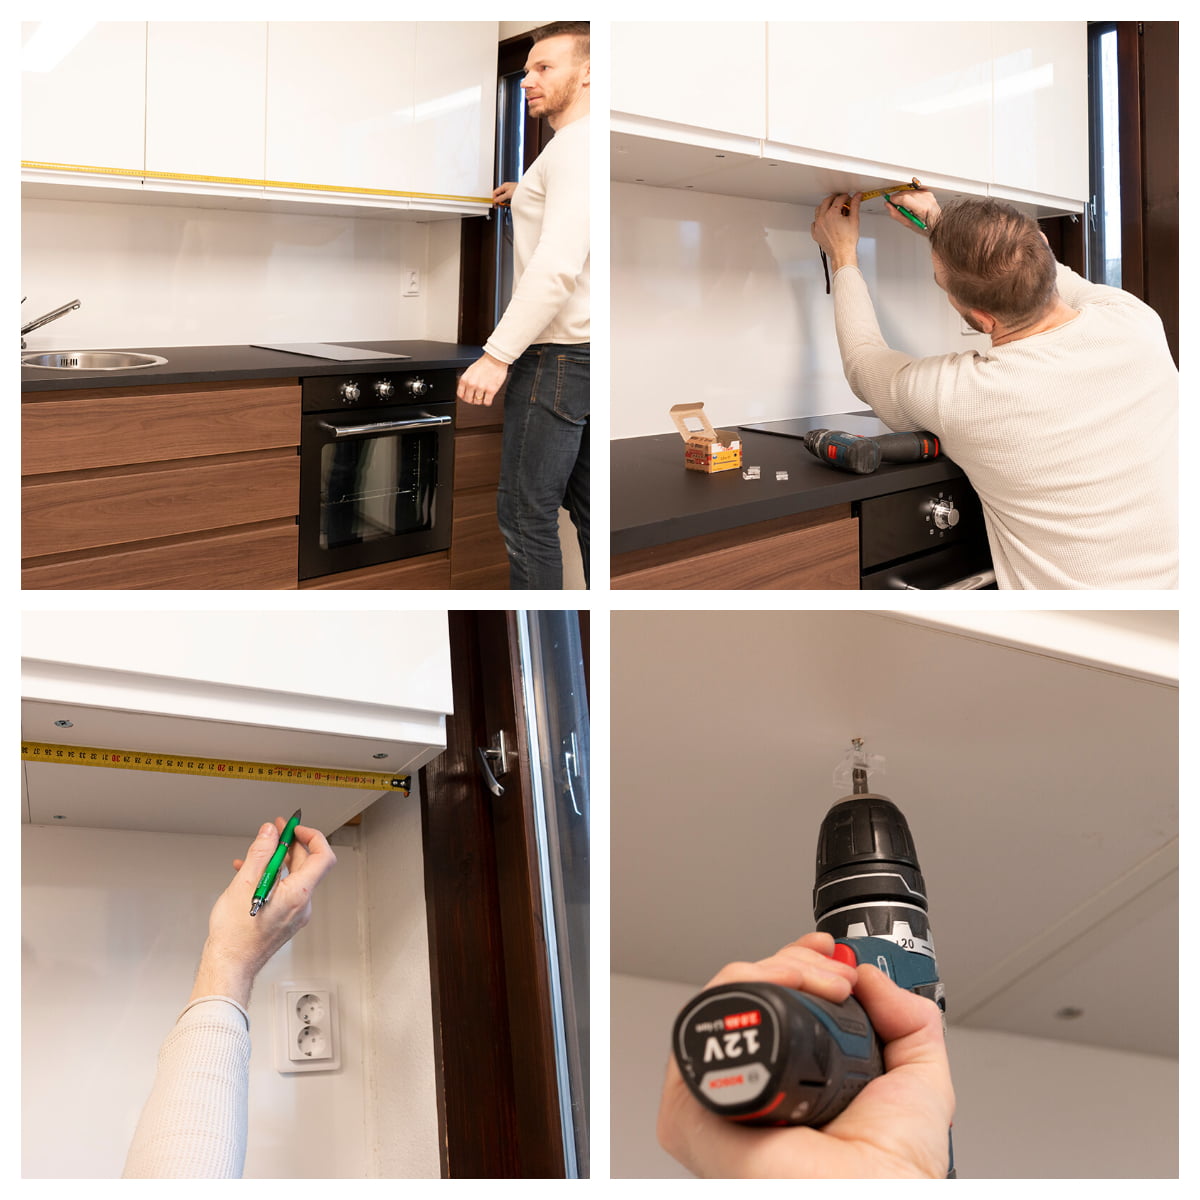
The kitchen lighting upgrade started by measuring the entire length of the cabinetry under which the LED strip lighting was to be installed. The total length of the cupboard was 2.4 metres. The light rail was left a few centimetres shorter than the total length of the cabinet, at 236 cm. The LED strip has a 5 cm cutting-off distance, so the LED strip was 235 cm. You are free to choose where you want to install the LED strip, at the front, in the middle or at the back of the cabinet. We have found that the best lighting for the whole level of the kitchen area is provided by a strip of LED light, mounted in the centre in relation to the worktop. In this case, centered on the countertop meant 10 cm from the front edge of the upper cabinetry. The led strip lighting can be installed under cabinets, as well as under the dish drainer, but we do not recommend it over the stove/range hood due to the heat and abundant water vapor. The led aluminium track is seamless from the top and aluminium is a rustproof material, so occasional dish spillages will not interfere with the led strip. In many cases, drying cabinets have a protective plate or a level connecting the cabinets, under which the led rail is installed, so that no water from the dishes can run off onto the rail at all.
Led rail installation in place
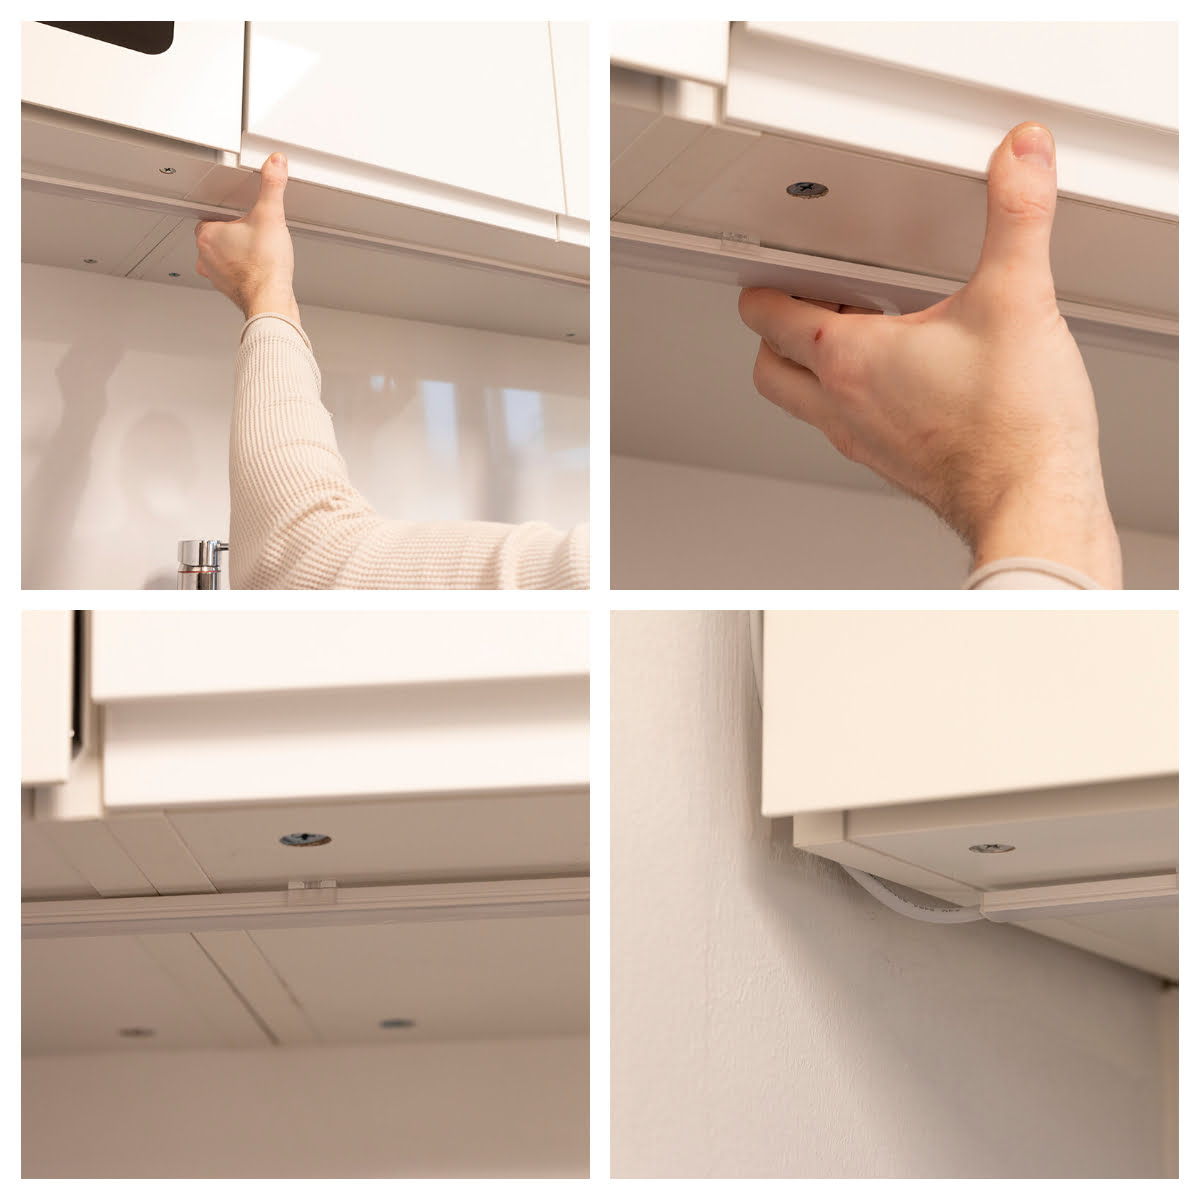
Kitchen lighting is stylish with led track. The rail can be easily installed by attaching the profile to the brackets. The brackets are designed so that the profile can be made to run flush underneath the cabinets, even if there is a difference of a millimetre or two in level at the ends of the cabinets. The low LED profile is also supplied with a plastic cover to protect the LED strip from dirt and water splashes, and to smooth the light from the selected LED strip into a beautiful light line that does not show individual LED dots. If the LED strip has a low number of LED dots, the low profile will make the dots stand out.
Activating the colour temperature controller/dimmer button
The control of colour temperature controlled LED strips is easiest to implement with a wireless controller, as a wired colour temperature control requires a three-wire low-current wiring. In addition to the wireless wall controller, wireless CCT control buttons are also available. CCT remote control is also possible, such as an in-line LED dimmer/colour temperature controller. When ordering a ready-to-install LED track from LedPaja, the pairing with the desired wireless controller is done in advance. If the parts are purchased “loose”, the pairing is done at the installation site. In wireless control, an RF connection is established between the RF transformer and the control button. The pairing is simple to do. When the transformer is powered, the LED track lights up. The battery cover is removed from behind the control button and the button is activated. On top of the transformer is an instruction button that is pressed once. Immediately afterwards, the control button is pressed. The lights flash once to indicate a successful pairing.
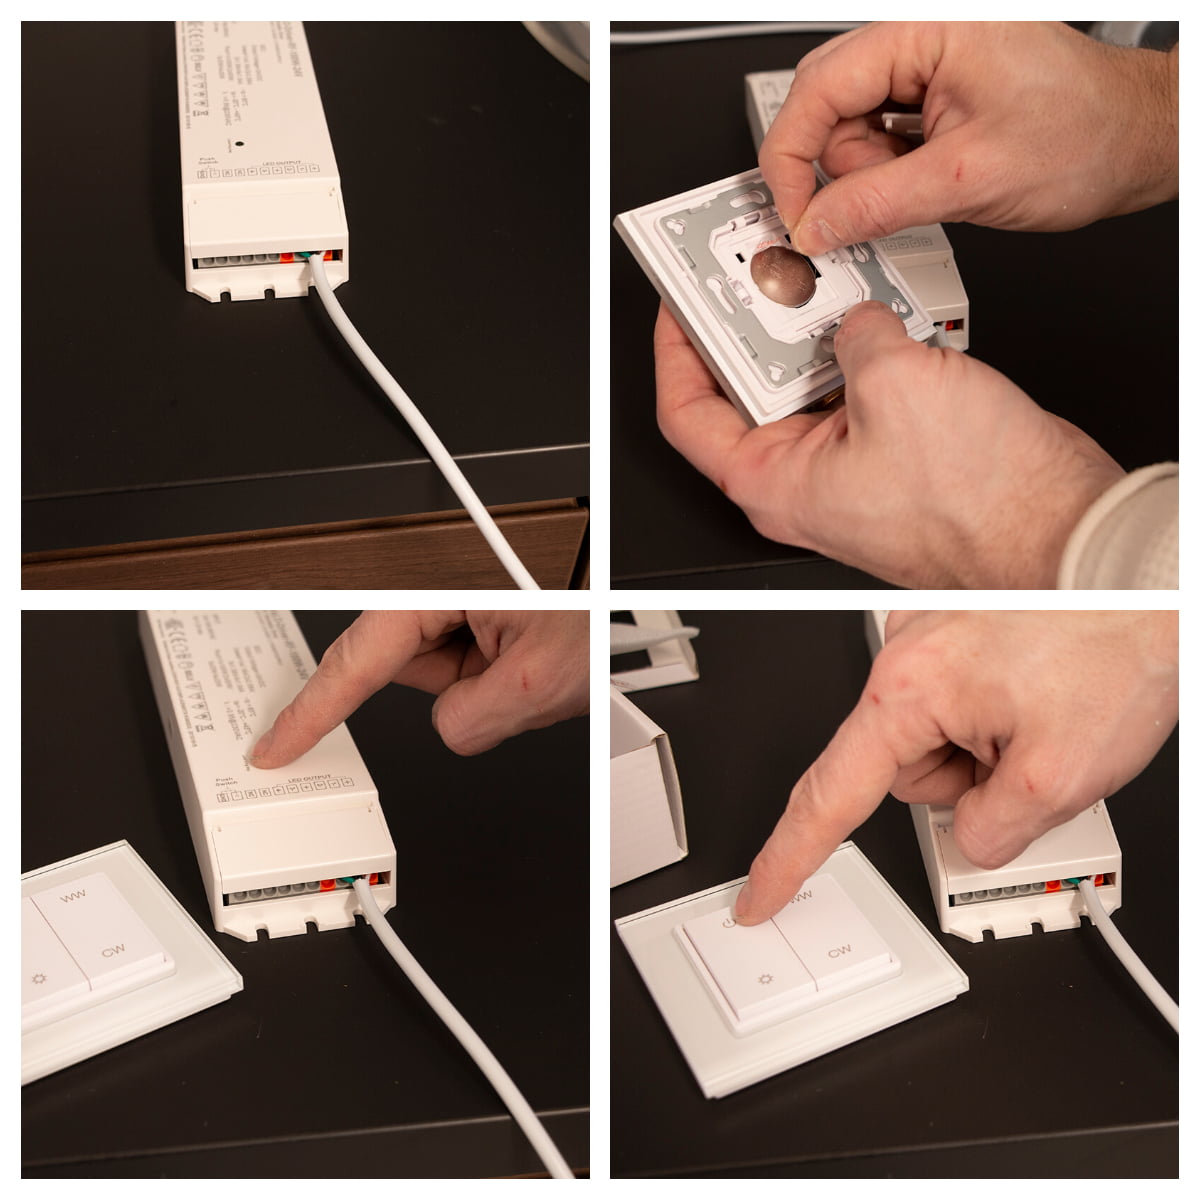
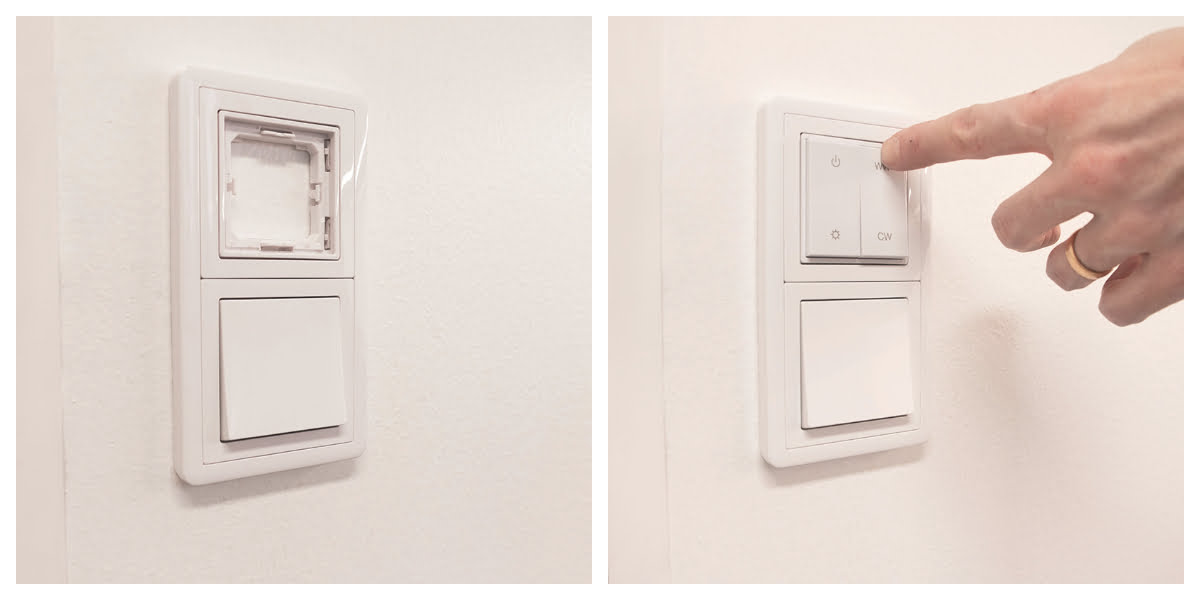
The kitchen already had a single lighting point with an on-off switch. The new, wireless pushbutton was to be placed in the same position as the Schneider Exxact series pushbutton. This was achieved by purchasing a two-piece wall frame, and removing the glass frame of the wireless pushbutton. The VaLO series button fits perfectly inside the frame.
Lighting control with wireless Zigbee control
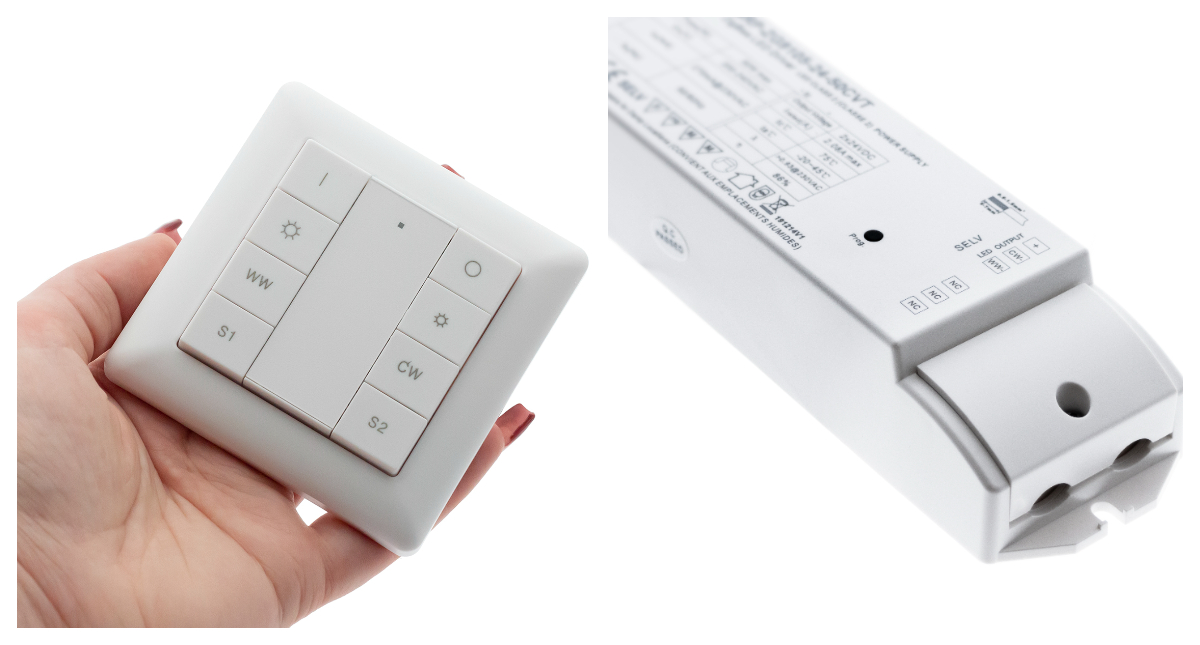
The lighting in the kitchen can also be controlled by Zigbee devices, which can be connected to a Philips Hue bridge, for example, so that timings and programming can also be done on mobile devices (mobile phone, tablet). If the bridge has not yet been purchased, the pairing between the Zigbee transformer and the dimming and colour temperature control button can also be done without it. Pairing is done as follows. Then, from the wireless button, hold down the S1 and S2 buttons simultaneously for more than 3 seconds. Keep the button less than 10 cm from the transformer at all times.
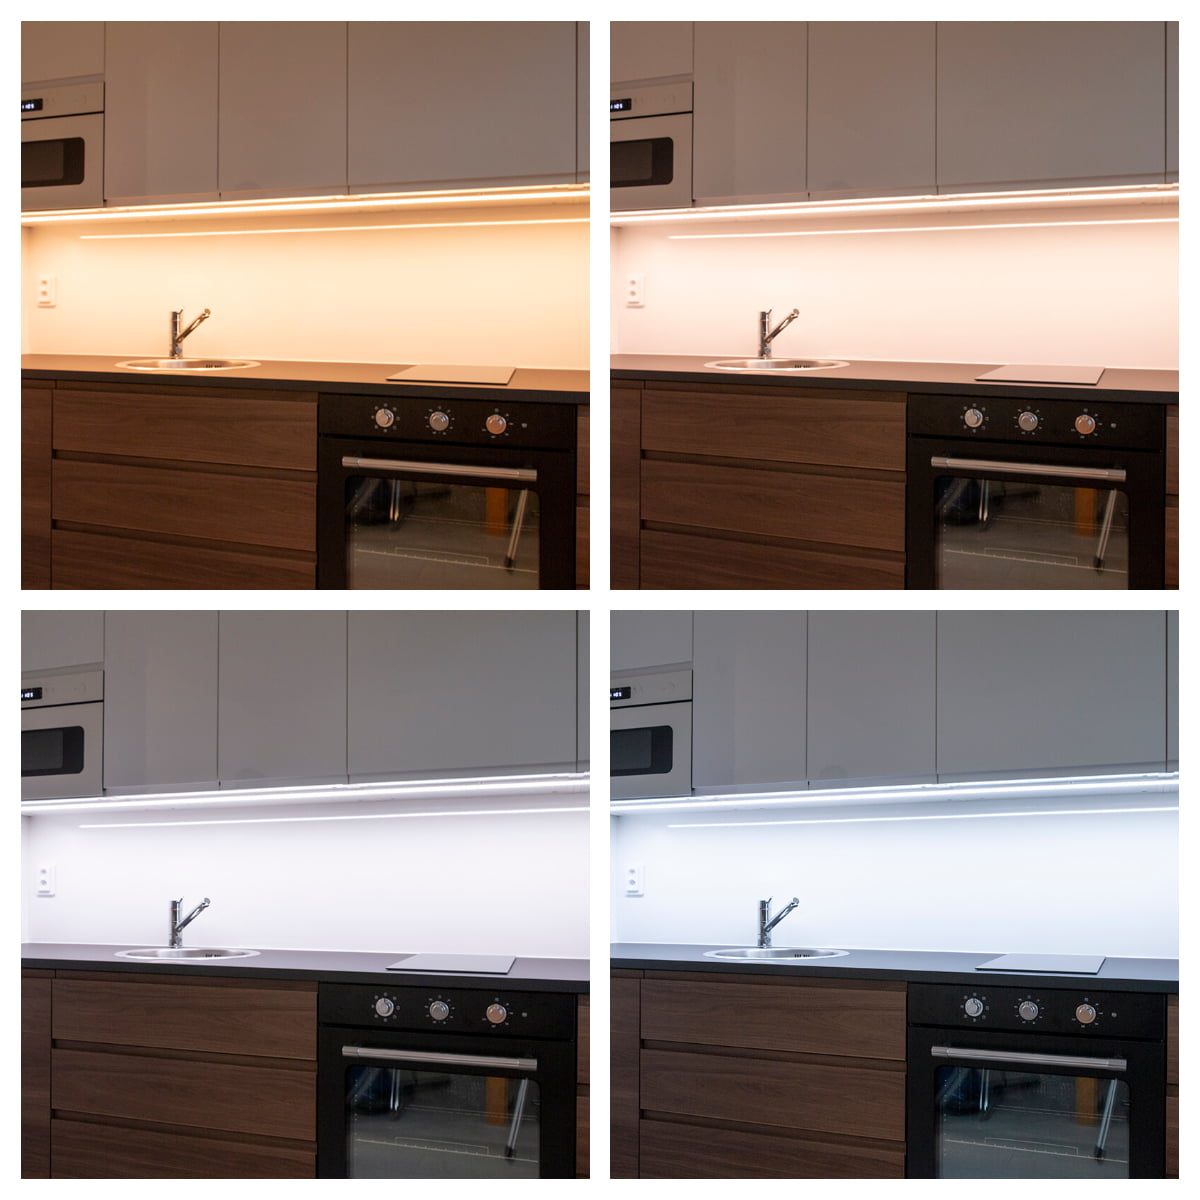
Pairing takes approx. 10 seconds. When pairing is complete, the lights will flash and the button’s green indicator light will stop flashing. To adjust the colour temperature of the lights, press and hold WW for a warmer colour and CW for a cooler colour. The colour temperature control is infinitely variable and the shades change gradually between approximately 2 800 Kelvin and 6 000 Kelvin. A start button turns the lights on and off. The button below the start button dims and brightens the lights with a long press. We’ve written about pairing in our Zigbee How-to series in our Zigbee Stories category.
The new lights in the kitchen area are temperature-controlled. Kitchen lights give atmosphere
The end result is great, and there’s enough light to work with. By adjusting the colour temperature, the whole kitchen mood changes from warm soft to bright daylight at the touch of a button. The lighting in the kitchen area exceeded expectations.
How much do lights cost for a kitchen partition? – You can calculate with LedStore’s LediPlan custom order calculator
On LedStore’s made-to-measure services page, you can calculate the price of LED track lighting according to your own kitchen measurements. LediPlan calculator has been released in April 2021 for easy calculation of the price of your kitchen LED strip lighting. The calculator allows you to enter the dimensions of your kitchen, and select all the components, i.e. the LED strip, the aluminium profile, and the type of dimming. The calculator provides a price for the ready-to-install implementation based on the given data and shapes. The calculator allows you to enter the dimensions for an I-shaped, L-shaped or U-shaped kitchen. The calculator is the only one of its kind in Finland so far, and with this calculator you can calculate the lighting in your kitchen partition. The service can be used to calculate options. For each option, you can send yourself a summary by e-mail. Once you have found a suitable solution, you can contact LedStore directly and we will go through the solution before we start work. You can also order an installation for your bespoke profile from us if required. If you need more information on this subject, read LedStore’s guide to custom-made strip lighting. We also have an online shop with ready-made five-metre packages for do-it-yourselfers.
Here led ribbon for kitchen packages
Come and see the colour temperature adjustable LED rails
The renovated kitchen featured in this story can be seen at the Led Store in Koivuhaa, Vantaa, at Mesikukantie 16, 01300 Vantaa. The shop/showroom displays all the products in the Led Store range, installed. In our premises you will find a lot of ideas for implementing LED lighting. Opening hours on Mondays and Fridays 8.30-15.30, Tuesday, Wednesday and Thursday 8.30-17, Saturday 10-14. Free parking for seven cars in the courtyard.
Welcome!
More renovation stories on our blog
We have a dedicated category on our blog, “Renovations”, where we publish articles that help you to make concrete lighting renovations. Below is a link to a few:
Toilet renovation with led strips
How to make decorative wall lighting and keep the price down
Acoustic spraying and recessed LED lights transformed the space – renovation presentation

