Summarize
- Energy-efficient LED lights are recommended to replace old fluorescent tube lights
- For the kitchen, a neutral 4000K light shade is recommended for the workspace
- High colour rendering index (CRI) improves the visibility of colours in lighting
- Led lighting saves 50-80% of energy consumption compared to older technologies
- Leave the installation work to a professional, especially the electrical work
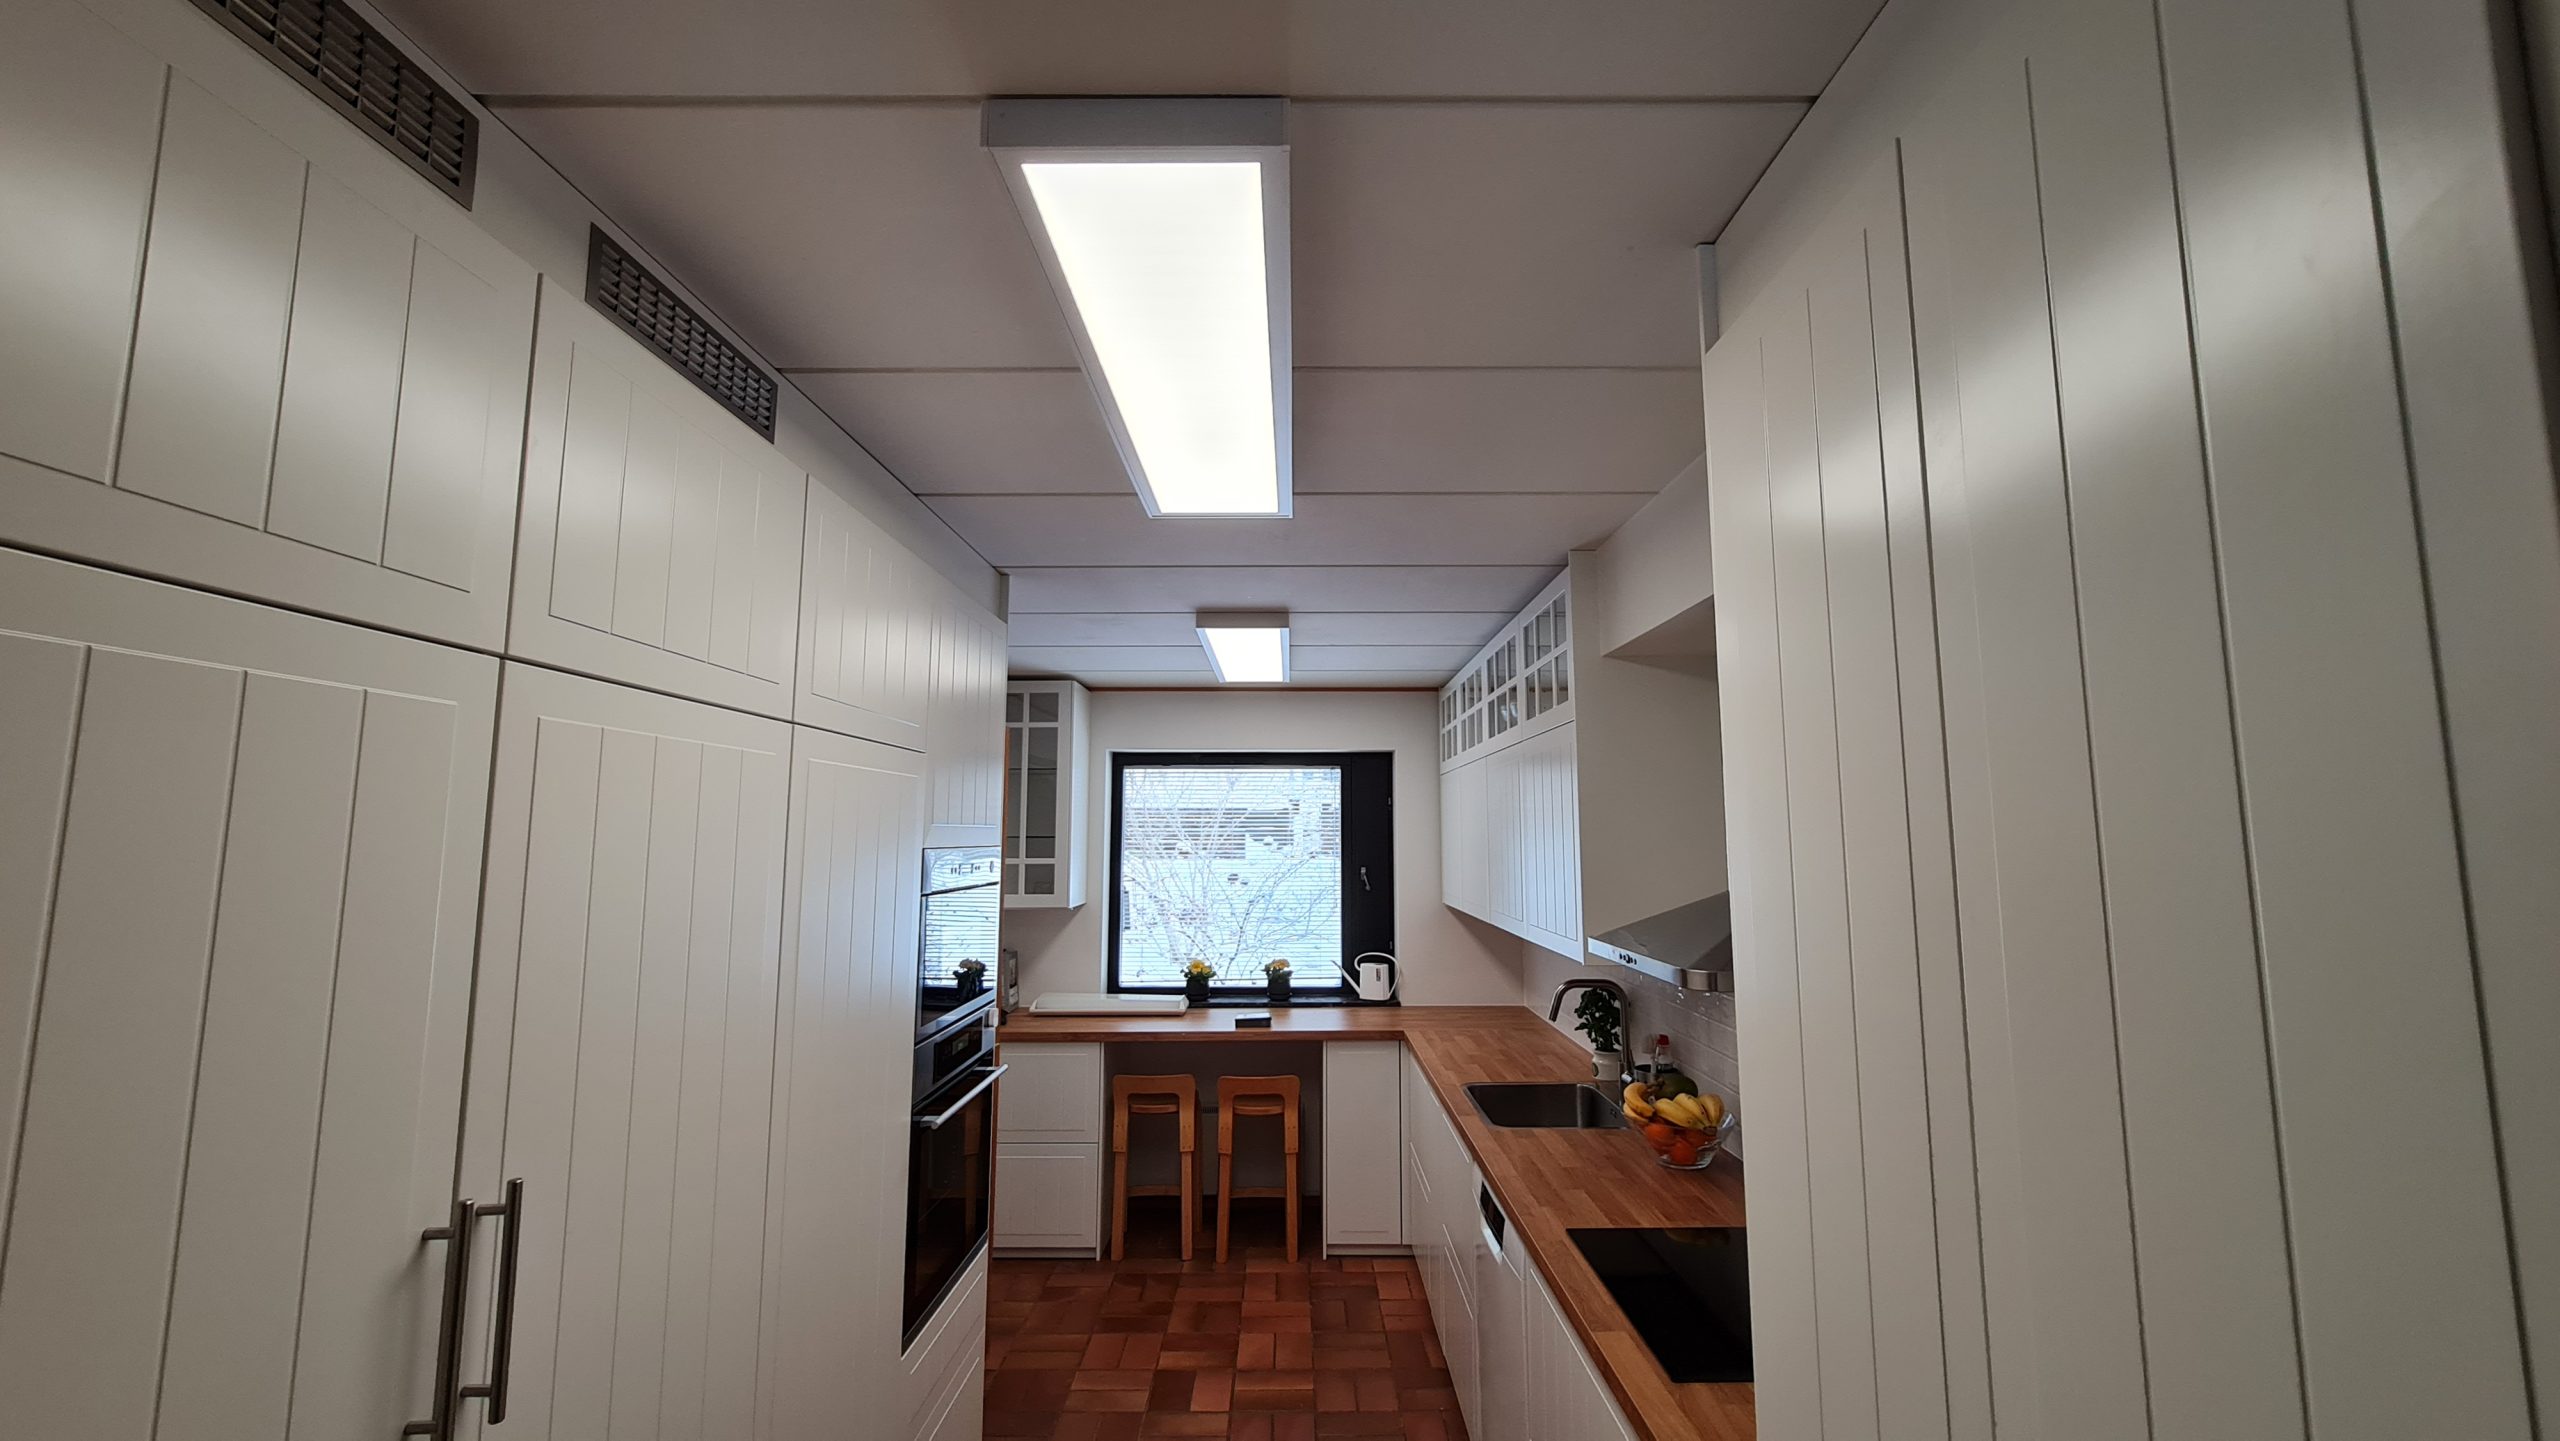
We want to replace the old fluorescent lighting fixtures in the kitchen ceiling. You got it! Just choose the right LED lights for the kitchen ceiling and replace them. There are many different types of luminaires available and here we go through a few options. Read here for instructions and steps on how to replace your kitchen lighting.
Which light colour for the kitchen?
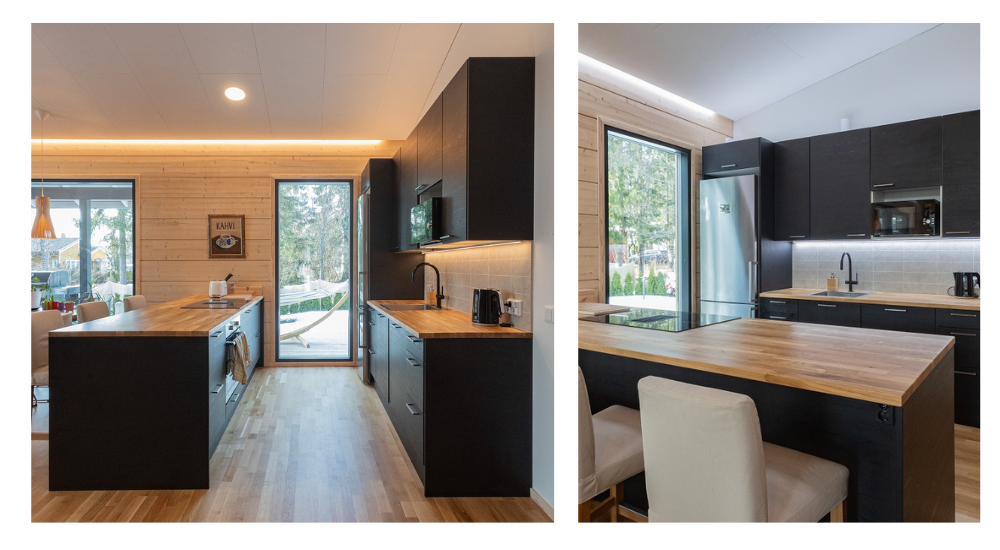
Led lights offer a wide range of light temperatures and we often come across the same question, “Which light colour is best for the kitchen?” The kitchen is a working space and we recommend using a neutral 4000K light shade in the kitchen. Some customers prefer warmer light in the kitchen and we recommend using temperature controlled lighting for different situations.
Colour rendering helps you see in the light
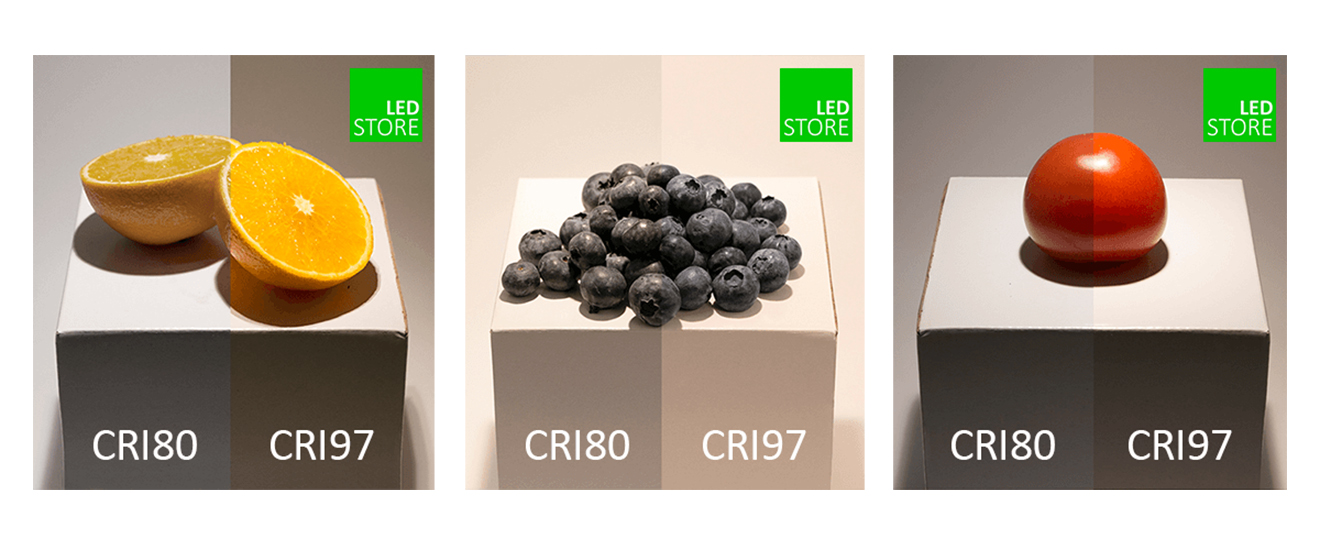
Whether you prefer a warm, neutral or temperature-controlled light tone, using high Colour Rendering Index (CRI) LED lighting will always give you success. High colour rendering helps the eye to work better and you see colours as they are intended.
Led is the best technology for the kitchen
Led lights for the kitchen ceiling is practically the only technology available. Halogen and fluorescent tube technology has been discontinued due to their low efficiency. This has been replaced by energy-efficient LED lighting, which saves 50-80% of energy consumption.
How much light is needed in the kitchen?
The kitchen can be divided into several parts, each with its own lighting needs. Ultimately, the materials and placement of lights will affect the final result, but in general the amount of light in different places could be as follows:
- Food preparation, worktops: 500-1000 lux
- Dining area: 100-200 lux
- General light: 200-300 lux
- Indirect light: 50-300 lux
Food preparation usually takes place on a worktop or island. This should have good, even lighting. The islands in particular are very popular and have become a universal space for homework and homework.
In the dining area, a lower level of light is usually sufficient, as you calm down while you eat. The exception to this, of course, is the modern remote workplace where work may be done at the kitchen table and where a more powerful general light or an efficient dining table light is required.
The general light in the ceiling is usually a steady direct light that spreads throughout the space. Such light sources are led panels.
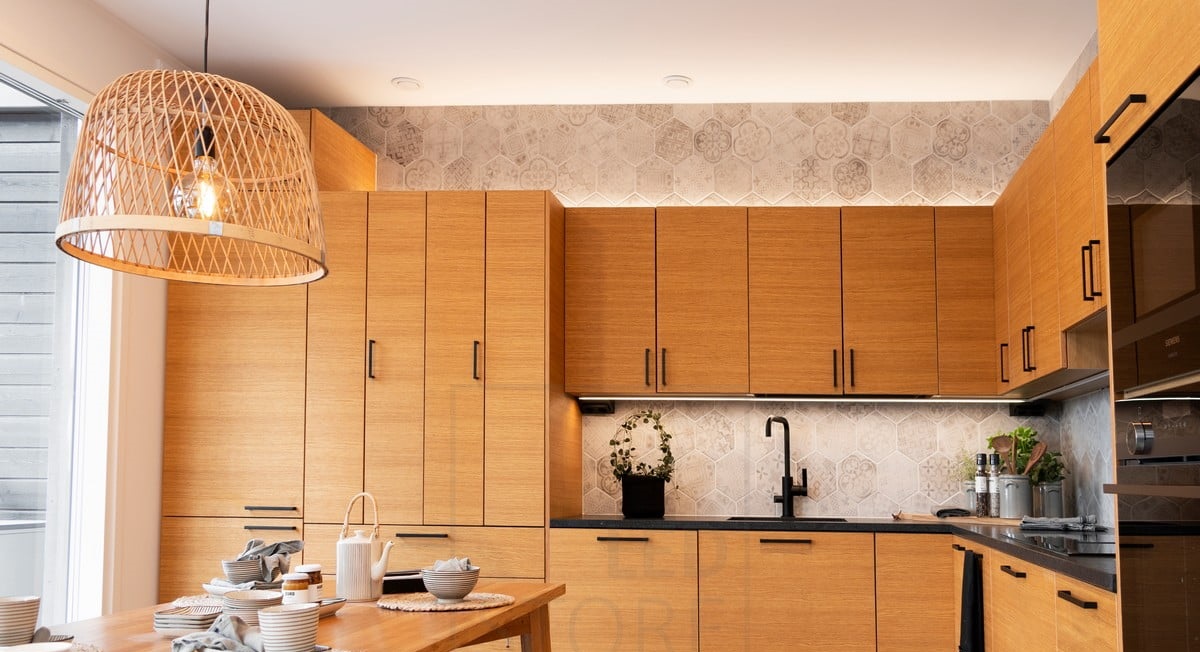
Indirect lighting is here to stay in kitchens too. LED strip lights on top of the cabinets or on the plinths provide atmospheric light that can be used to replace the general light completely by using a slightly more efficient lighting system on top of the cabinets.
Remember that indirect light is hardly ever enough to work with, so there must be reading and task lighting as well.
Led lights installed on the kitchen ceiling
Led lights for the kitchen ceiling can also be installed. When the need for replacement arises, the project starts with a visit to the LedStore showroom to explore the options. You can also buy and install lighting yourself in some cases, but replacing old fluorescent lighting is electrical work, so it’s better to leave it to a professional.
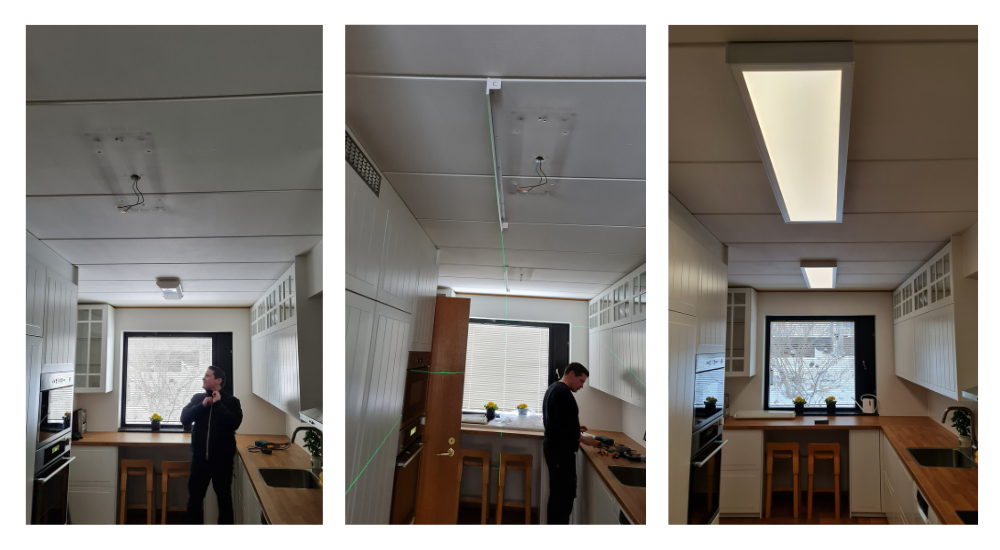
The steps for the installation of the surface-mounted LED panel were as follows:
- Power cut in the centre
- Dismantling old lamps
- Measure the installation locations with a laser and tape measure
- Fix the long sides of the frames to the ceiling
- Connecting the transformer of the lamp to the electricity supply
- Slide-inserted led panel into the frame to reach
- Turning the power back on and testing the hammer
- Select the desired light tone from the panel (3000/4000/5500K)
- Close the ends of the panel by attaching the last frames
- Let’s admire the result
Here are all the steps in more detail.
1. The electricity is cut off from the centre
Find the right fuse in the centre and remove power from the installation site. Electrical safety first. Remember that this is an electrical job.
2. Dismantling old lamps
The old light fittings will be dismantled, taken down from the ceiling and the cables inspected. At this point, before disconnecting the wires, check once more with an electric pencil or a meter to make sure that the voltage is definitely off.
3. Using a laser and tape measure to measure the installation locations
Measure the luminaire line and place the laser in the correct position. Draw the positions of the mounting frames on the ceiling.
4. Fix the long sides of the frames to the ceiling
This site had a stone roof, so props were used for fixing. The mounting frames for the surface-mounted LED panel are screwed to the ceiling from the long sides.
5. Connect the transformer of the lamp to the electricity supply
The transformer of the lamp can be connected to the electricity at this stage, because once the lamp is in place, there is no more space between the frame and the ceiling for fingers.
6. Slide the led panel into the frame to reach
The springs of the Led panel are removed by unscrewing them. The LED panel is then simply slid from the end to the frame and connected to the quick connector on the transformer.
7. Turn the power back on and test the lamp
Now that the LED panel is inside the bezel and the power supply is connected, the power can be turned back on and the lamp tested. Hey it works!
8. Select the desired light tone from the panel (3000/4000/5500K)
There is a switch between the lamp and the transformer from which you can choose the shade you prefer. For this project, we wanted to choose a warm tone.
9. Close the ends of the panel by fixing the last frames
Once the luminaires have been tested and the shade of light selected, all that remains is to close the ends of the frames and clean up.
10. Admire the end result
With the messes cleaned up and the old lamps packed in the SER waste, you can admire the result. The amount of light increased significantly (compared to 2 pcs 2 x 120cm T8 fluorescent tubes) and the kitchen is very happy!
What does it cost to replace kitchen lighting?
The price usually consists of three components. Installation work, lighting and electrical accessories. The cost of this item was 676,00€
Installation work
In this case, 4 hours of working time and travel were spent, at a cost of 248,00€
Led luminaires
For the Led luminaires, for their size, the old 300×1200 LED panel with surface-mounted frames was chosen. The price of the panels was 179,00€ / piece and the frames 35,00€ / piece. So a total of 428,00€
Electrical supplies
No electrical accessories were needed, as the lamp transformers could be connected directly to the electrical wires, without the need to extend or move the wires.
As you can see, the cost is not huge. If you are interested in replacing your lighting fixtures, you can find surface-mounted LED panels here. And if you need help, our installation service is here to help!
Versatility with colour temperature control
The same luminaires can also be installed with a wirelessly controlled transformer, allowing the colour temperature of the light to be easily adjusted to the desired Kelvin level with a wireless controller on the wall, and dimmed. For example, warm dim light for evening light or a slightly more neutral and brighter light when you want to cook.
For this project, a 600×600 surface-mounted LED panel was used. We wanted to increase the amount of light significantly, as dark furniture in the kitchen eats up light.
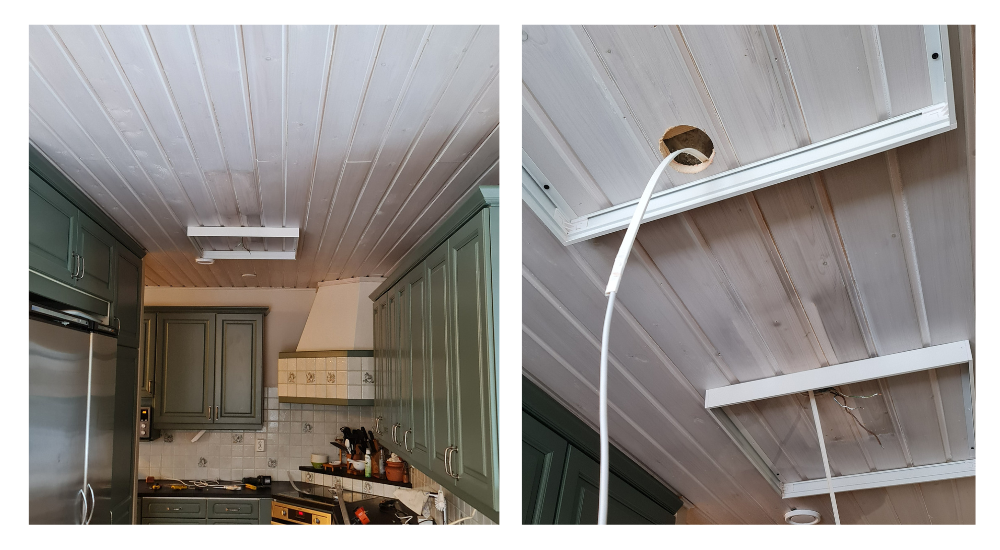
Since the ceiling was panel, holes could be drilled in the ceiling inside the frames and the wire could be discreetly run to another panel inside the ceiling.
Note thewireless buttons in the bottom left corner that can be used to seamlessly control the temperature of the worktop and the ceiling lighting in this location.
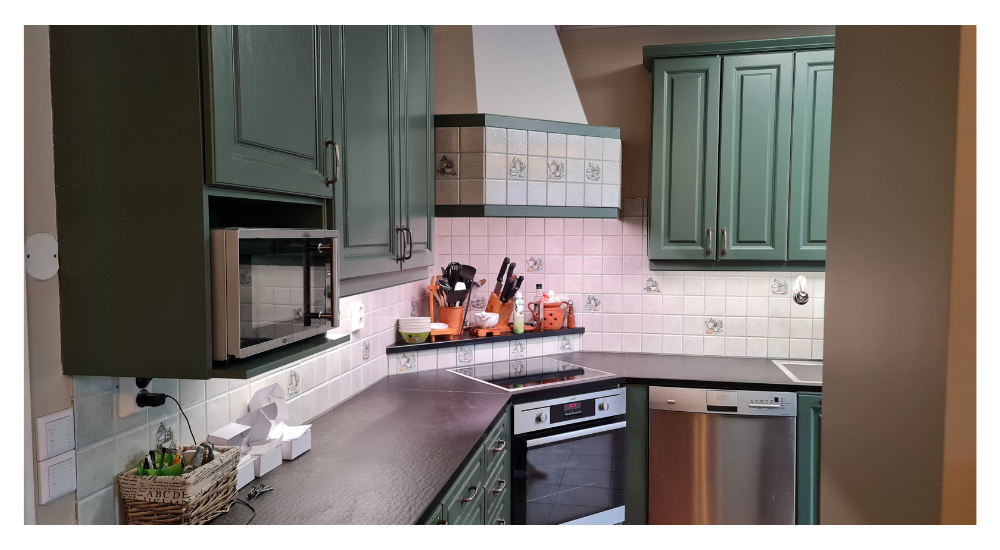
Philips HUE and various home automations
Those interested in home automation could choose Zigbee transformers with LED panels and thus control lighting with different systems. It allows, among other things, timings and automations. In addition to the Zigbee transformer, you also need a Zigbee bridge, i.e. a hub, such as Philips Hue, Led Store’s Azoula or even Conbee2 and Homeassistant.
Lighting expert
LedStore has been an expert in LED lighting and lighting design since 2010. We have our own product design, so our products are technologically state-of-the-art. Products have quarantee for up to 7 years. We also carry out lighting maintenance.
We focus on temperature-controlled and high colour rendering lights, so they work brilliantly and last a long time. We do around 500 lighting designs for our clients’ sites. Read more here or order a lighting design
We offer a service of custom-made led strips, i.e. custom-made led strips in aluminium profile. Also installed. Did you know? LedStore offers lighting design from 169 euros for the whole house!
Remember that we are always ready to offer our help to you along the way, by email (myynti@ledstore.fi) and by phone (045 251 4510). As always, feel free to share photos of your own projects on social media at ledstore.fi at Instagram and ledstore.fi at Meta. We love to see the great things our LEDs do, and it helps to provide inspiration for those who are unsure of the power and awesomeness of LEDs. Did you know that we already have over 3500 pictures of our LED installations in our Gallery!
Gallery of Led lights:
Product gallery: Pictures of products in different installation locations
Indirect light: Indirect light in different spaces
Room-specific: Light in different rooms
References: Complete houses that have been photographed

